Saturday, January 20, 2007

What not to boil


Would you believe me if I told you that I voluntarily got up at 6:00am on a Saturday morning, when I could have otherwise been sleeping in? Well I did. Today was an important day, a day that all New Havenites across the 3 mile city have looked forward to for more than a year: The Destruction of the New Haven Coliseum. This decades-old structure was in the midst of a complicated political strife for some time, and eventually the city got its act together to finalize its destruction early this Saturday morning. Greg and I had prime seats in a city-sponsored early morning tailgate on the top of a parking garage. The garage was about 500 feet from the Coliseum, and we were on the 7th floor. Here are a few photos (sequential from upper left -> upper right -> lower left -> lower right):


Pretty cool, hu? After the explosion, we spent the rest of the morning trying to get breakfast with our friends Alex and Joy. Everywhere was packed, until finally we went to our favorite greasy spoon joint, where they serve buttery eggs, toast with little packets of jam and hash browns like they have at McDonalds. I know, not the pinnacle of all things delicately flavored - but for a slightly-out-of-it morning (e.g., following a night involving alcohol, or when getting up at 6am for silly reasons like watching a giant building implode), Clark's Dairy is just what the doctor calls. After waiting two hours for our food (Two hours! I know!), Greg prepped himself for a night trip to the 30th birthday party of a high school friend, and I prepped myself for a trip to Toronto.

Now, the last time I flew on an airplane, I was headed to Minneapolis to give a presentation in front of a group of people I was very nervous to be in front of. The night before, I tried a new moisturizer and woke with a red rash across my face so hideous I didn't even bother documenting it with a photo. Many ice-packs, some anti-inflammatory topicals and a good night's sleep left me okay 24 hours later. But the time before that trip, I flew to Arizona for thanksgiving, and I spent the night cleaning up after a very, very sick dog... then I missed my flight. The time before that, I was flying first to gut house destroyed by Katrina in New Orleans, then to a wedding in Indiana, and by the time I got home, Greg and I were engaged. I.e., exciting things happen when I travel, and it's not always what I would expect. This trip is to Toronto. It's for five days, and it's the first time I've ever been out of the country. Before leaving my blog to the mercy of the internet black hole for a week, I thought I'd post a new recipe.


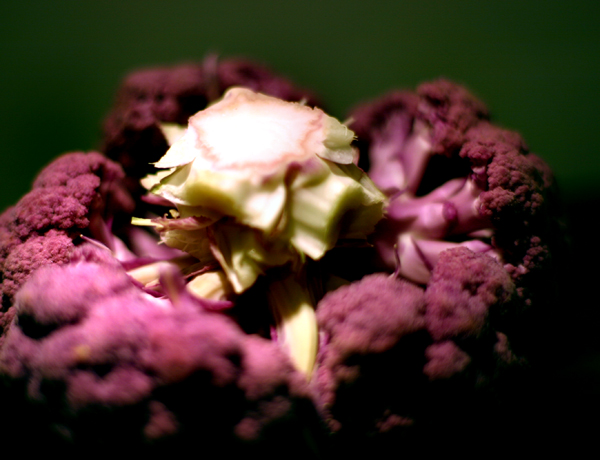
In case you couldn't tell, today's recipe has something to do with cauliflower. And not just any cauliflower - this is purple cauliflower. I picked it up from a local market with the idea that I would roast it. I've been reading a lot about roasting cauliflower, and it sounds like the perfect method to cook this cruciferous vegetable: roasting concentrates and intensifies flavors. The subtle flavor of its normally creamy white version could use such culinary modification. Plus, I wanted to take a photo of it. Green and purple are complementary colors - what did the inside look like, I wondered? After I roasted it (with a few red onions to boot), the purple color became quite intense, taking on a bluish tone. I love the striations.
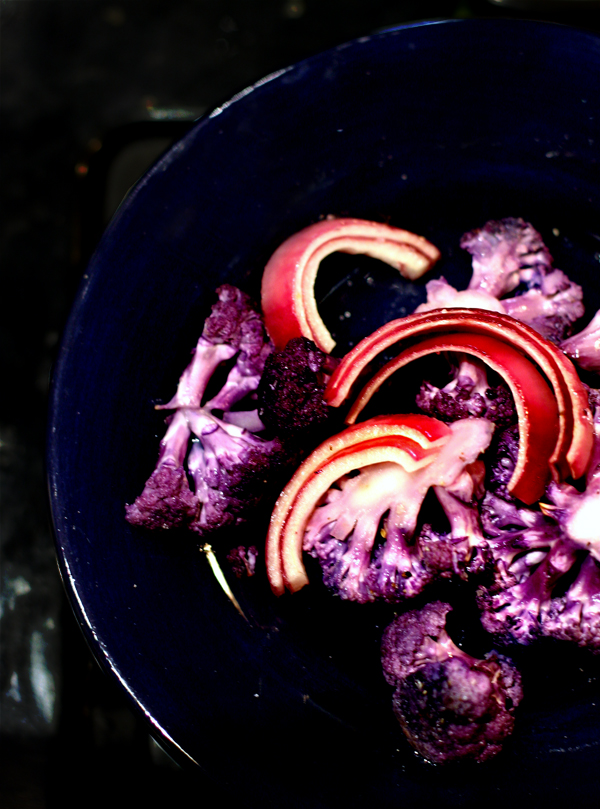

I drizzled 1" cuts of cauliflower with olive oil and grated sea salt. The salt helps draw out moisture to hasten the roasting process. I roasted mine for about 40 minutes, although I think next time I'd cut the cauliflower into small florets instead of slices cook the vegetable more uniformly. Once roasted, this cauliflower tasted truly wonderful: intense, earthy, but somehow not too heavy... I'm not sure if I'll bother boiling cauliflower again.
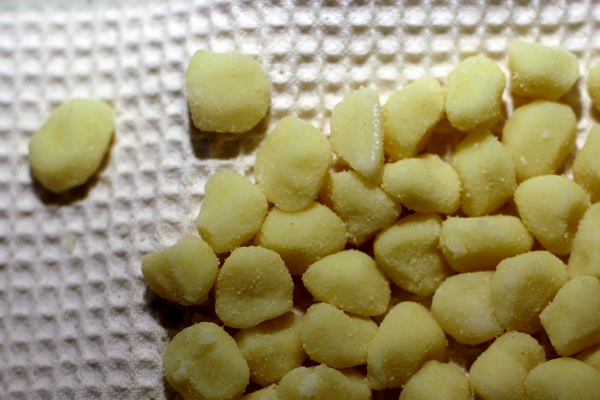

Speaking of what not to boil, I wasn't sure what to serve this with, since I wanted to the vegetable flavor to be the start of the show. I decided on a way to cook gnocchi that I've tried before. The first time I fried raw gnocchi, they were dumplings I had made myself (i.e., irregularly shaped and a little soft). It was quite good. Then I tried frying the store-bought version (i.e., regularly shaped and with a firm texture). That was awesome, and something I've been repeating lately because it was so awesome. (Yes, I will use that word). The outside of the gnocchi becomes crisp and buttery. The inside is composed of soft potatoey goodness. It's like an adult version of a french fry, except you want to drench it in butter, cheese, and anything else you'd make pasta with.


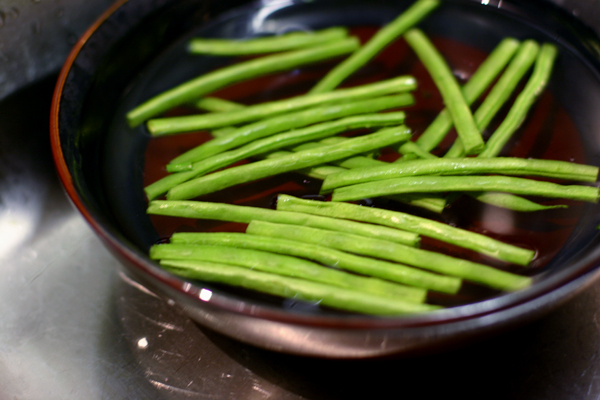
I decided to fry the gnocchi and make a quick pan sauce of red peppers, green onions and light cream. Red peppers, I give a thumbs up to. Green onion? Not so much. Although the photos have green onion in it, I would replace that with a little parsley next time - the flavor of the onion was just a too strong. I could also envision this with a sundried tomato / roasted pepper sauce. Oh yum, now I want to cook it again! Ignoring my daydreaming and back to the cooking: I served this version with green beans that turned a fantastic bright green after I steamed them. Mmmm. I think that'll sum up my review of this dish : )

Enjoy this recipe, and even if you never roast cauliflower or don't want to bother with the pan sauce... fry up some gnocchi and serve it with fresh cheese and grated black pepper. I promise you that you'll never boil gnocchi again. It's really delicious.


Roasted Cauliflower

1 head cauliflower
1 red onion
1/4 cup olive oil
Freshly grated sea salt and black pepper

  1. Preheat oven to 300 degrees
  2. Cut the green base of the cauliflower and peel back any leaves. Wash thoroughly by holding upside down under running water. Slice cauliflower into thin slices (1/2-1") or cut into florets of uniform size. Cut red onion into 1/2" slices. Keeping the thickness of the cauliflower uniform is important to ensure all pieces cook evenly
  3. Place vegetable pieces on baking sheet. Brush oil over one surface, salt and pepper to taste, and repeat process for opposite side
  4. Bake for approximately 45 minutes, depending on thickness (should be fork tender). Keep on eye on the oven to prevent the cauliflower from burning

Pan Fried Gnocchi with Pepper Cream Sauce and Roasted Cauliflower
Serves 4

1 package store bought gnocchi (1lb)
4 tbsp butter
1 large red pepper, chopped finely
1/4 bunch flat leaf parsley, chopped*
3/4 c light cream
1/2 tsp white pepper
1 head roasted cauliflower, cut into small florets
  1. In medium fry pan, melt butter. Once the butter starts browning, add gnocchi and toss to coat. Continually toss and fry gnocchi for 4-5 minutes, until gnocchi are soft throughout and golden crispy on the outside. Drain on several paper towels if desired (I did)
  2. Add chopped red pepper to pan and cook over medium heat until softened, approximately 3-4 minutes.
  3. Return gnocchi to pan; add parsley and cream. Simmer over low heat for an additional minute and then season with white pepper.
  4. Toss with roasted cauliflower and serve.
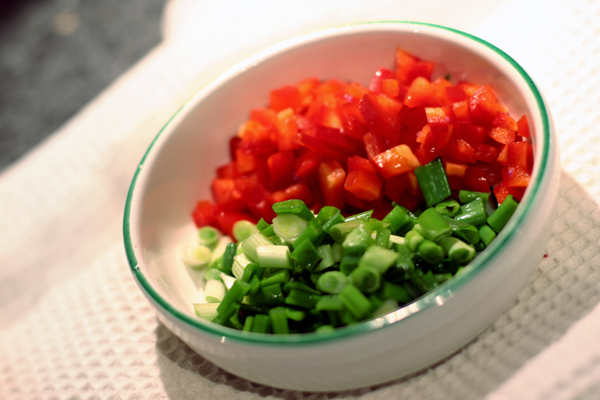
(*note, of course in my version I used green onion, as you can see in the pictures... but I am sure this would be much better with parsley instead... )

Tuesday, January 16, 2007

Mlinci My Way


Not to be dramatic or anything (because, heck, life has enough drama without making food a item worthy of unpleasant excitement), but this recipe I am about to talk about? It was seriously one of the most interesting things I've ever made. The twist on homemade pasta is subtle, but it packs a culinary punch. As soon as I saw it, I knew I had to try it.


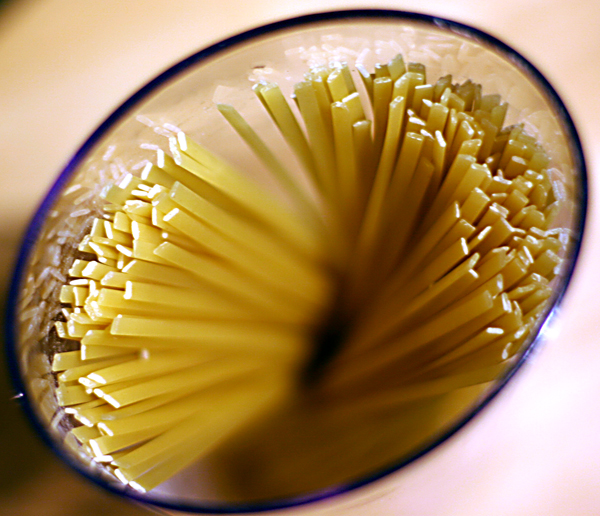
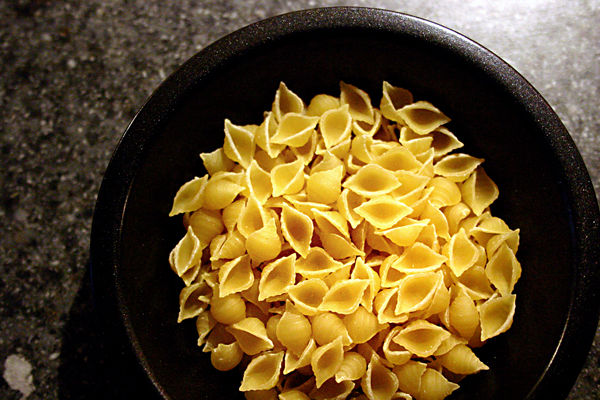
I'm a pasta fanatic. All through high school, every morning at 6am, I would turn on the stove, boil some salted water, and cook up tiny alphabits, little shells, or miniature stars. Breakfast always had butter and Parmesan on it. Weird? Kinda. Delicious, filling and carbohydrate packed? Absolutely. The key was the shape of the pasta, I quickly discovered. Penne or Linguine were no good - it felt like dinner. But little alphabits? (And that's alphabits not alphabets!). It was like eating oatmeal. You may taunt me, but until you try it with the Tiny Pasta, you're not allowed to judge. Even today, I still get the craving for my pseudo Italian breakfast.


I learned a lesson from this strange high school breakfast tradition: size matters. We already know that some types of pasta are better suited than others to certain tasks. Although the basic ingredients to pasta are almost always the same (flour, egg and water), the form that the dough takes once rolled out and cooked determines the success or failure of a meal. Flat pasta forms are good for thin sauces. Pasta with interesting shapes need chunky sauces. Ridges need clingy sauces. Etc. The best analogy would be using different shapes of wine glasses to serve different kinds of wine - even though the wine is the true star of the show, the type of glass can make or break the flavor of the wine.


I found this particular pasta variation as I was flipping through the January 2007 issue of Gourmet. I was drooling over the gorgeous food, the romantic writing, and best of all, the beautiful photos, when I stumbled onto today's topic: a pasta dish called Mlinci. According to Gourmet, Mlinci is a toasted, irregularly broken flat pasta that is rehydrated in the cooking juices of braised meat. I was intrigued by the idea of toasting pasta in the oven, but of course meat is out of the question for me.


How is Mlinci traditionally cooked, I wondered? To random google search I headed. It turns out that Mlinci is not an Italian dish at all. It is actually Croatian in origin, and it technically refers to a crispy, flat breadish dough made with yeast, broken into pieces and soaked in steaming water for upwards of an hour. It is later lightly fried in cooking juices from meat or a little butter and cheese. Conveniently enough, I actually work with someone who is from Croatia. According to him, it is pronounced something like mlin-tsi (not mlin-chi) and he's had it boiled and tossed with pan drippings from braised meat and potatoes. He also said that the dish seemed more pasta-like than bread-like. Maybe Gourmet had it right and google had it wrong.


Fascinating. How did Gourmet reach this version of the recipe, and what was the best way to cook it without meat? I settled on the following three ways to try Mlinci:
  1. Mlinci "my way": boiled in salted water like pasta and tossed with a Broccoli, Shallot and Cream Sauce
  2. Mlinci "traditional": soaked in steaming water for 15 minutes, drained, and soaked for an additional hour. Served with butter and grated cheese
  3. Mlinici "Italian": baked dry with a spicy red sauce and peppers like Lasagna

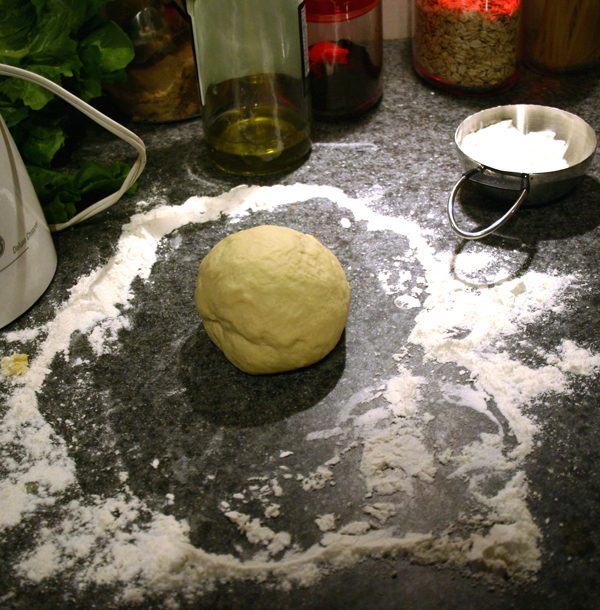
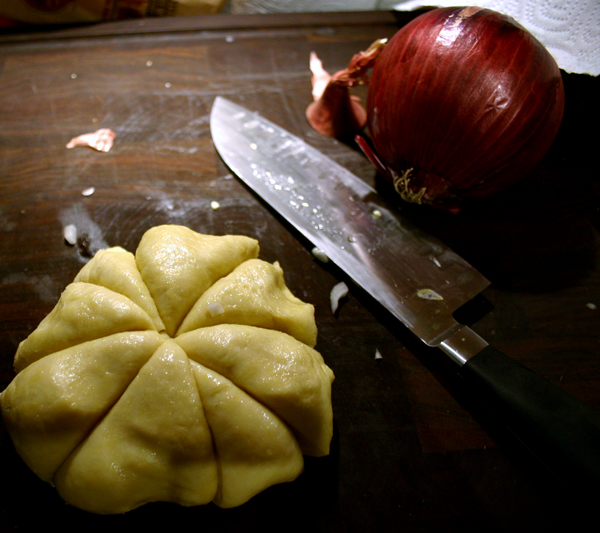
With a food-sampler-at-hand (Greg), I proceeded. The recipe called for quite a bit of olive oil and no salt, yielding a very moist and fruity dough that was tasty all on its own. I tried rolling the dough with a pasta machine to achieve a uniform thickness, but it was too elastic and ended up tearing. I would suggest rolling by hand and adding more flour as you go along. I weighed my flour to be precise (1 cup = 120g), and still I needed at least half a cup extra.


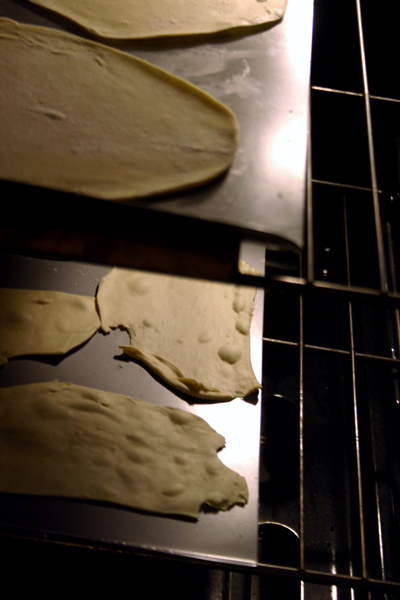
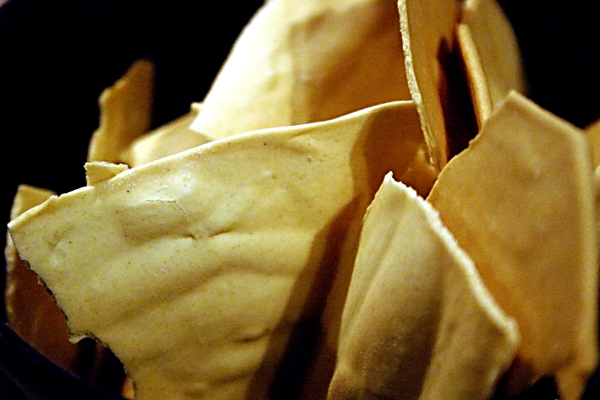
Although the original recipe called for toasting large 11x17 sheets of dough, I wasn't that talented in my flattening abilities. Instead, I added my oddly shaped, large-"ish" pieces to hot pans in a 325 degree oven. As I rolled more dough I kept an eye on the toasting pasta, turning and flipping the sheets every few minutes. Once the dough was golden and crispy throughout, I left it on the counter to cool and proceeded with another pan. Eventually I broke the larger shapes into small pieces. I have no idea how large the broken pieces should be or how thick the original sheets are made best, but I'd say mine were about 1mm thick and a few square inches once they were broken up. After I cooked everything up, I decided thinner was better, and my several square inch size was just right to fit on a fork (smaller fell off and larger wasn't as well cooked).


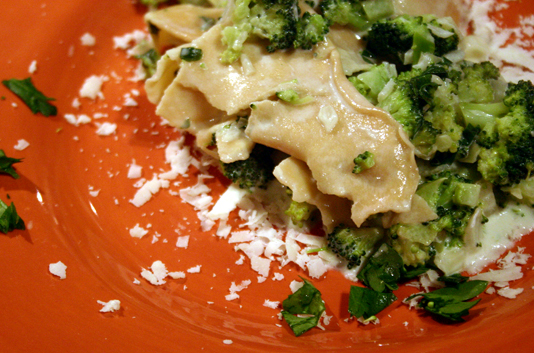
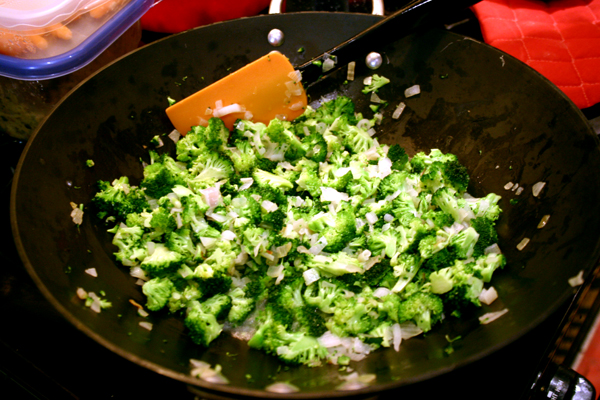
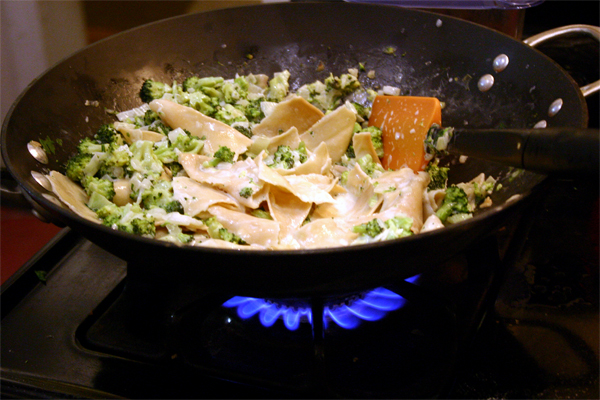
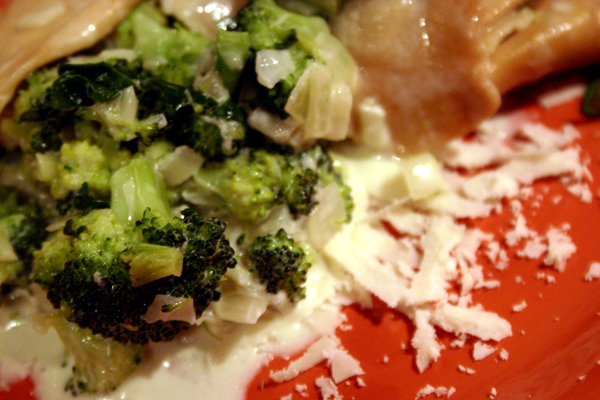
Last night I tried Creation #1: Mlinci with Broccoli, Shallot and Cream Sauce. I wanted to keep the sauce as simple as possible, and I also wanted something to complement the nuttiness of the toasted pasta. Cream base it was, broccoli for mild flavor, and shallots to replace what otherwise would have been garlic. It was delicious, full of flavor and entirely satisfying. Truly, this was a fascinating take on pasta. The simple but sauce was gave subtle flavor to the toasted pasta. Greg and I loved it and together declared it one of the best recipes in memory. The salty Romano cheese that failed so dramatically in another recipe brought the flavors together perfectly in this one, since the broccoli, cream base and pasta dough all lacked salt. Best of all, even though the dough is somewhat time consuming to prepare, roll out, and toast, once the recipe is complete, the flat sheets are shelf stable for quite some time. It will be a nice substitution as we get bored of traditional Italian fare.


Next time? I think the Broccoli and Shallot sauce was sublime and simple the way we had it, but I do love cooking with wine and I'd like to try a little white wine butter sauce. I also wonder about a brown butter walnut sauce. Stay tuned for reports of the other two versions of this recipe.


Mlinci with Broccoli and Shallot Cream Sauce

*Note: I used only half of the Mlinci below, so this quantity of sauce is for two very generous servings of sauce (I figured we were getting our veggies too, so it was all right to go heavy on the sauce)

1 tbsp olive oil
1 tbsp butter
2 large shallots, chopped
3 heads of broccoli, chopped into small florets (discard stems)
1 cup light cream
1 tbsp flour
2 tsp white pepper
Salt to taste
Romano cheese, grated
  1. Start a large pot of water boiling. Melt butter and olive oil together in a shallow saute pan. Add chopped shallots and cook over low heat until softened. Add broccoli and 1/2 cup water. Steam lightly until broccoli is cooked through and the water has evaporated.
  2. Add light cream. Reserve 1 tbsp and mix with flour, then whisk into sauce. Simmer gently over low heat until sauce has thickened and reduced to a creamy consistency (10-15 minutes). Season to taste.
  3. Meanwhile, stir Mlinci into the boiling water and cook until almost done - the texture will remind you of a cracker.
  4. Drain Mlinci and toss with broccoli sauce. Finish cooking over a low simmer in the sauce (5-10 minutes) until very tender. Dish up with grated Romano cheese.


Mlinci Dough
Paraphrased from January 2007 Gourmet Magazine

*Note, with ~240g of flour, this should be 4-5 56g "servings" of pasta, but in reality this makes just enough for 4 conservative (but main course) servings. I.e., this needs a good veggie or salad on the side for a complete dinner for four.

2 cups (240g) all purpose flour
2 1/2 tbsp olive oil
4 1/2 tbsp cold water
2 eggs
  1. Add flour to a food processor and pulse to aerate. Whisk oil, water and eggs together in a small bowl. Add 1/4 of the fluids and pulse to mix. Continue adding until the dough has formed a sticky ball and gathered away from the sides of the bowl. (If too sticky, add more flour. If too dry, add more water)
  2. Turn onto a floured surface and knead until smooth and elastic, incorporating more flour as necessary to keep the dough from sticking. Place in an oiled bowl and rest at room temperature for 30 minutes.
  3. Meanwhile, preheat oven to 325 degrees. Divide dough into quarters and roll out one quarter at a time into thin (approximately 1mm) sheets. Place sheets on a nonstick baking pan and toast in oven, turning every few minutes and rotating pan. The pasta is finished when it is a golden color and crispy throughout.
  4. Allow sheets to cool and break into smaller pieces. Store in an airtight container until ready to use.

Thursday, January 11, 2007

Green Onions in January


Life on the East Coast has been Just Plain Weird lately. I don't get it. 70 degrees in January? Are you kidding me? It snowed (flurries) four days later. Wardrobe dilemmas aside, it leaves my tastebuds dazed and confused. Do I want the hot cappuchino or the iced latte? Hearty soup or refreshing salad? Ice cream or apple pie for desert? (Maybe both?).


Yesterday's venture into recipe avenue also led me astray. It started out with a location and all the best of intentions. I felt tired of hearty, heavy food and wanted something satisfying but relatively light that was not Yet Another Salad. I began perusing epicurious.com for interesting salmon recipes, whereupon I discovered "Poached Salmon with Tarragon Sauce and Fingerling Potatoes". It received absolutely wonderful reviews from everyone who had made it. It looked fresh, filling, and easy. Best of all, the flavors were delicate - a nice change from my recent adventures with mushrooms.


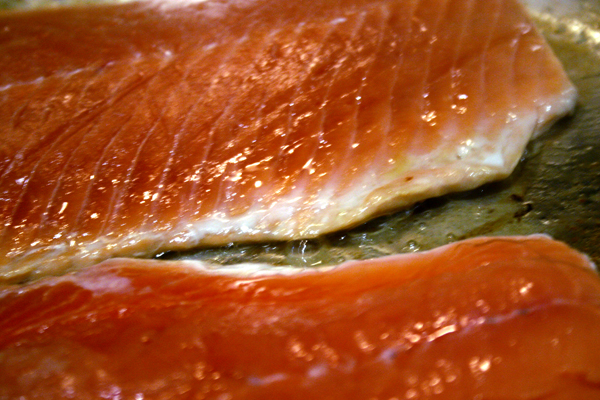
Now, I have a thing for salmon that goes beyond this particularly hilarious poster. My dad makes the best salmon around - grilled, fresh, with lots of garlic on top and sometimes a bit of Lawry's Seasoned Salt and bits of char where the grill marks are. Oh, I have never had better Salmon than the dinner he grills up. It is a versatile fish, because although it is somewhat fatty and sweet, it can hold up to a robust sauce in a way that other moist fish like Tilapia can't. Best of all, Wild Alaskan Salmon is one of the most environmentally responsible fish choices out there, because of the well sustained and responsibly harvested fish population in Alaska (don't be fooled by Atlantic Salmon, which is an overfished population, or farmed salmon, which is not as Earth Friendly as one might think).


If you haven't had wild salmon (look for varieties like Sockeye and Silverbright), you haven't had salmon at all - the real stuff simply does not compare to its relatively flavorless, mushy, and environmental-damage-inducing neighbor, farmed salmon. The first time I cooked wild salmon, I had to get Greg to agree that the fish was actually cooked - the color is vibrant, the texture is different, and the taste is strong and delicious. All taste aside, the development of a natural, thriving salmon population in Alaska is really something every saavy citizen should think about when choosing which fish to buy.


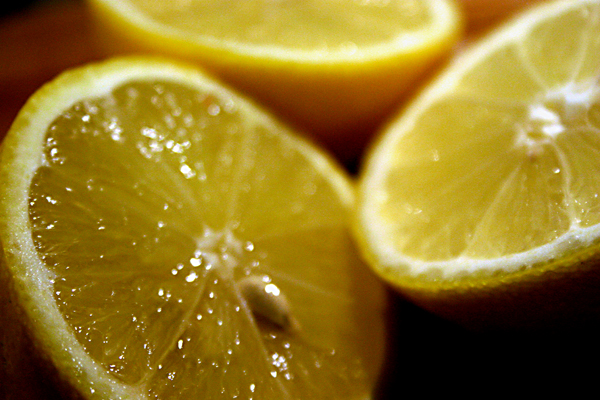
The recipe of interest thus follows... salmon is poached in a broth of white wine and then served alongside a creamy mayonaise based sauce with fresh taragon, chives, parsley and shallot. White wine viniger and Dijon round out the acid flavors in the sauce. The sauce was to be the true star of the show: tangy, zippy and fresh. I made up my shopping list and walked to the store with the following experience:
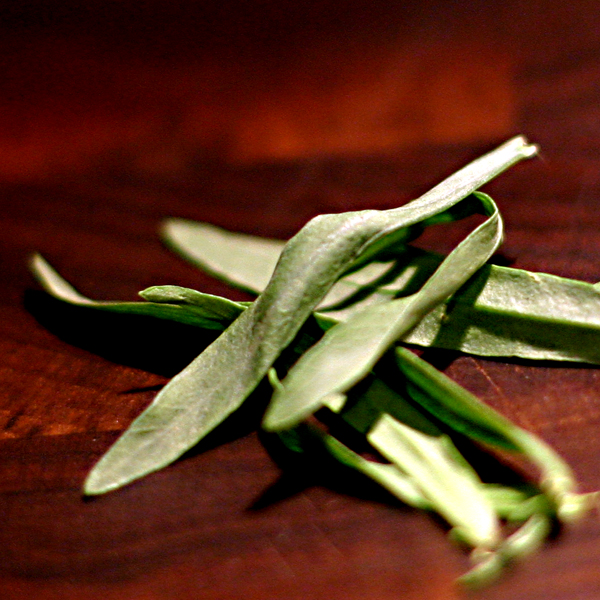
  1. The tarragon was wilted and dull (It's January. What on earth was I expecting?)
  2. Chives were nowhere to be located
  3. The store didn't carry shallots
  4. For some reason I came home with a bag of spinach


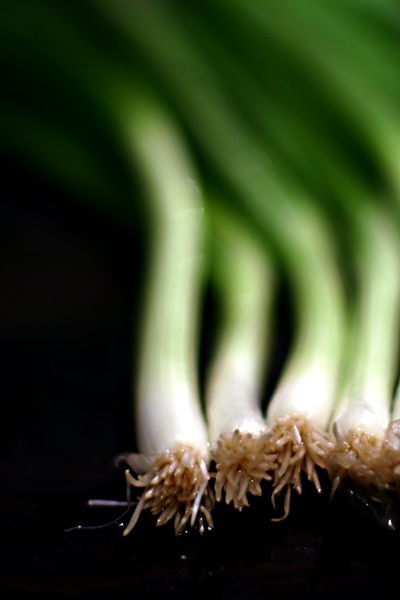
Given the above difficulties (why would anything like cooking dinner ever be simple?), I decided on a substitution that is perhaps an obvious but Not Quite Right match: green onion and garlic for the chives and shallot. The general flavors of onion, garlic and that undefinable "fresh" were there, true, but green onion and garlic are very harsh flavors whereas chive and shallot would have been subtle, mellow and, well, perfect, had they been available. I was worried that the sauce would have too much bite, although it turned out later that I needn't be. Seeing as I had some spinach (and no idea how it got in my shopping basket) and an impatient mood on my hands, I decided on a few more modifications:
  1. Panfry the salmon
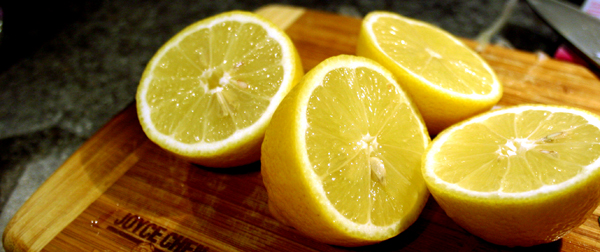
  2. Substitute pasta for potatoes, and make a quick sauce of sliced onion, capers, lemon and butter
  3. Wilt in some spinach at the end so as to not feel entirely silly about bringing it home without a purpose.

And, thank goodness, it all worked out great. This was a wonderful meal, a completely different flavor from my more recent salty choices, and it was not very time consuming to prepare. The pasta was a bit tart and might not suit everyone's personal taste (be forewarned), but I really wanted that burst of flavor and I appreciated having a contrast to the mayonaise based sauce. I wouldn't call it a polished recipe, but it worked for what I was craving that night. The tarragon sauce, however, is a definite keeper. The recipe listed makes quite a bit extra (more than one cup for my two serving recipe!), but it's the right flavor to dip almost anything in. Literally, I think it would make overboiled cabbage taste good. In fact, we had it over eggs and toast for today's breakfast, it'll be poured on top of lettuce as a dressing for today's dinner, and I think tomorrow I'll toss in some warm diced new potatoes with whatever's left for a little upbeat potato salad.

Thank goodness for "Spring" in January, right?

Salmon with Tarragon, Green Onion and Garlic Sauce
Recipe adapted from Epicurious

For sauce
1 large bunches fresh tarragon
4 stalks green onions
3 cloves garlic
3/4 cup fresh flat-leafed parsley leaves
1 cup mayonnaise
1/4 cup rice vinegar (not seasoned)
2 teaspoons Dijon mustard

For fish
1 tbsp olive oil
1 cup baby spinach leaves
1-2 pound salmon fillet(s)

In a food processor puree tarragon, green onions, and garlic with remaining sauce ingredients until smooth and season with salt and pepper. Sauce may be made 1 day ahead and chilled, covered. Bring sauce to cool room temperature before serving.

Heat oil in pan and add fish. Sear lightly on each side (1 minute per) and add 1 cup water. Cover to steam fish and finish cooking (approximately 5-10 minutes, depending on the thickness of fish). Plate fish and empty pan, reserving 2 tbsp cooking juices. Wilt spinach in juices over low heat (approximately 1 minute) and spoon over salmon with previously prepared tarragon sauce with freshly grated pepper.


Fettuchini with Lemon, Capers and Onion

1/2 onion, sliced thinly
1/4 cup capers
1 medium lemon
3 tbsp
Pasta for two servings (~150g - I used Fettuchini)
Parmesan to serve over the top

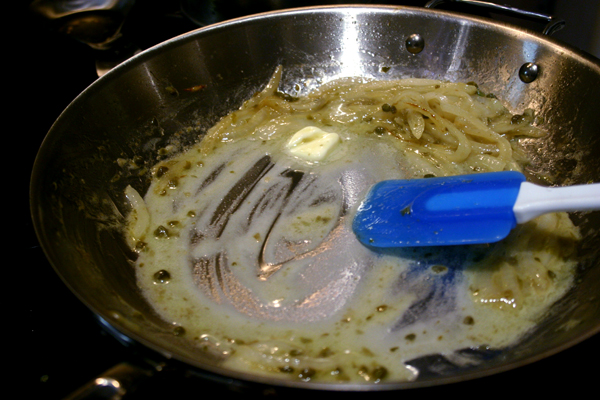
Bring large pot of salted water to boil for pasta. Meanwhile, add onion, capers and 1 tbsp butter to pan and cook gently over low heat until onions are soft and cooked through. When the water boils, cook pasta according to package directions. Add the juice of 1 lemon and 2tbsp pasta water to the pan. Reduce by half, stir in remaining butter and capers. Toss with drained pasta and serve with freshly grated parmesan.

Sunday, January 07, 2007

Salt Induced Coma

Note: In celebration of putting together a slightly more official (and useful) wedding website at www.rachaelandgreg.com, this blogspot will indeed be a cooking blog from now on. Thanks for reading!! I will probably still post some Italy related updates, but everything is pretty much all settled.


Well I can't quite decide what's wrong with me, but I think I've settled on the explanation that I must be subconsciously assembling information for a series of books with titles like "Counterproductive Ways To Motivate Yourself To Exercise" or "1001 Reasons Why My Kitchen Will Never Be Clean". I can't seem to stop cooking. And although there was an entryless week immediately following New Years while we ate salad and carrot sticks for dinner every night, I am back to cooking and baking all things that are filling and heavy and full of salt. Oh, but it is good.


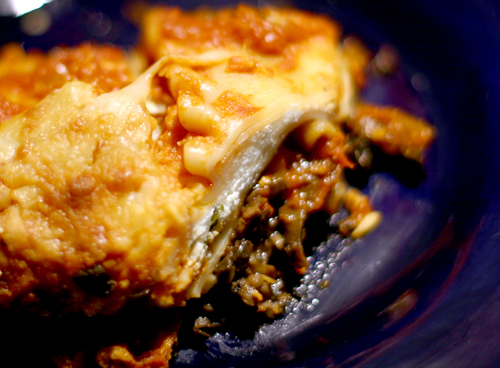
Saturday night we had our friends Kim and Ian over for dinner. I needed something yummy and suitable for our 3 out of 4 vegetarian crowd that didn't require any last minute prep. Lasagna it was. Lately I've been playing with lasagna ingredients (as you may remember the fate of the last Pesto Lasagna, which was of course re-created with a slightly different recipe the next day). Having had such recent success with mushroom risotto, I was still in the mood for something earthy and palette pleasing, and thus a recipe for mushroom lasagna was born.


A few surefire tricks to make mushroom flavor pop:

1) Don't salt cooking mushrooms. Do. Not. Salt. Salt brings out moisture, so if you add salt, mushrooms steam/boil in their own juices and cook at a much lower temperature than they would otherwise. Heating them without salt allows the mushrooms to brown up nicely


2) My favorite trick for getting flavor out of mushrooms involves deglazing with low sodium vegetable stock (for details, see the recipe below). When the mushrooms start cooking, they look something like the photo above. When they finish, they look something like the photo below.

3) Since fresh porcinis are usually out of budget, look for dried ones in a specialty food store. They can be rehydrated easily, as pictured below. Dried mushrooms are far more affordable and impart great flavor into a mushroom dish. I almost always have multiple varieties of dried mushrooms on hand.

I thought this recipe was really good with one exception: the cheese combination I used was incredibly salty and it masked the intense mushroom flavor. I think the Romano cheese was the culprit, whose presence wasn't entirely necessary anyway, given the addition of smoked mozzarella. I decided on smoked mozzarella based on Kim's own lasagna that she served us several months back - for a vegetarian dish, it lends a very hearty depth of flavor that you can't get out of vegetables alone. Plus, the sauce I used (oh do I cringe as I say this) was out of a bottle and may have contributed to the amount of salt here.. a shame that saving 10 minutes made such an impact on the success of this dish.


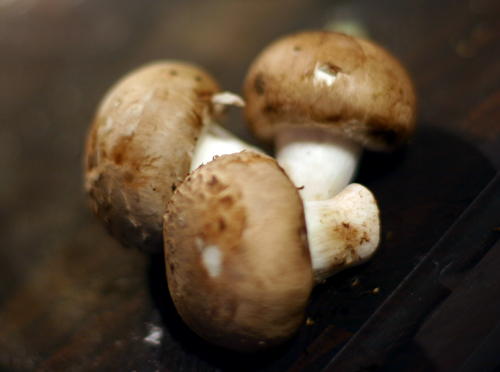
I used the mushrooms I had on hand, though probably any combination would work well. Baby bella's don't have much flavor - they only contribute body and moisture - so dried mushrooms are key to this dish. Next time I'd add a little rosemary. Other changes? More mushrooms, I think, and a homemade sauce. I would puree some whole canned tomatoeswith a little garlic and basil and leave it at that.


Hearty Mushroom Lasagna

1/4 c olive oil
16 oz baby bellas (2 packages), chopped finely
1-2 cups low sodium vegetable stock (look for something bitter, not sweet)
1/2 small mayan onion, chopped
5 cloves garlic, minced
1/2 tsp ground white pepper

1 cup water
10 oz dried porcini mushrooms
10 oz dried black trumpet mushrooms

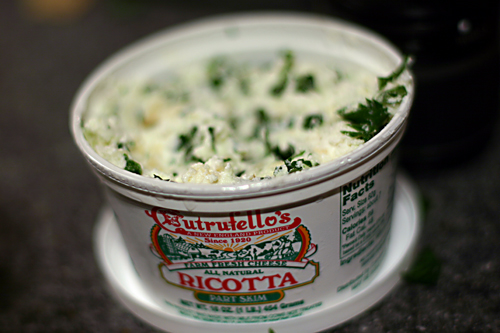
16 oz part skim ricotta
1/4 bunch flat leaf parsley
2 cups grated low moisture Mozzarella cheese
1 cup grated smoked Mozzarella cheese
1/2 cup grated Romano cheese

1. Add the oil to a pan and turn the heat to medium. Add mushrooms and toss to coat

2. Caramelize mushrooms in oil over the course of 40 minutes:
- Allow juices to develop and reduce until mushrooms begin to stick to the pan
- Deglaze with 1/4 cup stock
- Repeat

3. Prepare the dried mushrooms:
- Add mushrooms to 1 cup steaming hot water
- Submerge and allow to rest for 5 minutes
- Remove mushrooms, rinse under cold water and squeeze dry
- Pour reserved mushroom water through a double cheese cloth lined sieve
- Mince reserved mushrooms
- Add rehydrated mushrooms and broth to existing pan

4. Prepare the lasagna noodles:
- Cook in boiling water until a white chalky core barely remains
- Shock in cold water to halt the cooking process

5. Prepare the cheese mixture:
- Grate the cheeses and toss to mix
- Add one third of cheese mixture to ricotta
- Stir in flat leaf parsley and grated black pepper

6. When the mushrooms have finished cooking, add the chopped onions and garlic to the mixture in the pan.

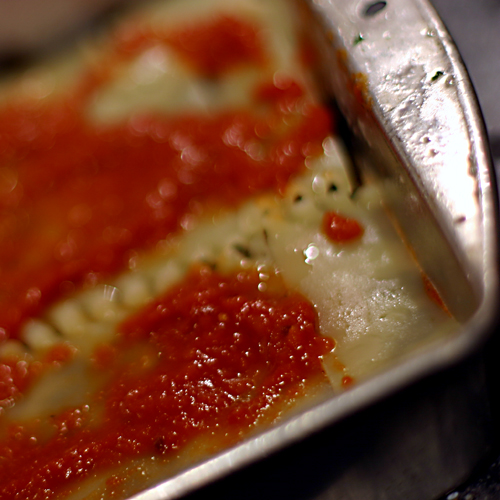
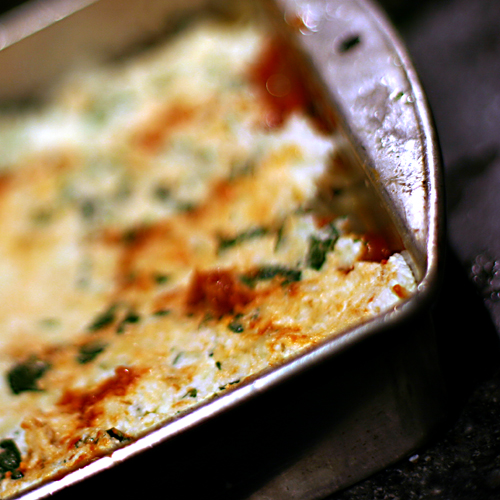
7. Layer and bake at 350 for an hour. Allow to rest 15 minutes prior to serving


On to even more cooking topics...

After suffering from salt induced coma the next morning, somehow Greg and I found the will-power to join a friend at one of our favorite local places: Rudy's Bar, where they serve the best french fries you've ever had. One potato and grease saturated dinner later, we went home and sat on the couch all night. If you are what you eat, Greg and I were over-salted couch potatoes. Somehow I mustered up the caloric energy to try one more recipe, something out of my brand new Cook's Illustrated Subscription that I just Had To Try.


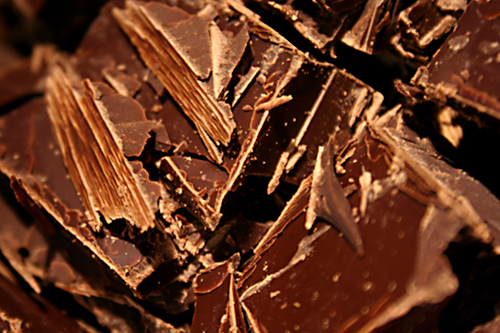
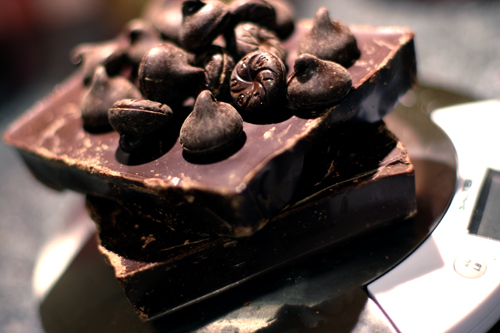
What was it? Fudge. Strange, hu? I've hardly ever even had fudge, believe it or not - maybe once or twice in my life. We didn't eat much candy growing up, and despite a propensity for chocolate, this particular form of it never called to me. But something about the Cook's Illustrated article drew me. It described how complex and easy to screw up traditional fudge candy recipes can be, and how the author of the article spent 4 months and manufactured 1000lb of the dense chocolate cubes before settling on what they considered to be the ultimate, the perfect, and the easiest fudge recipe around.


Here is it is in its original form. In my own recipe, I didn't have unsweetened chocolate on hand, so I added 1tbsp of espresso powder to counteract the sweetness of the semisweet chocolate. I also toasted the walnuts before adding them.


I discovered two tricks while making this recipe:
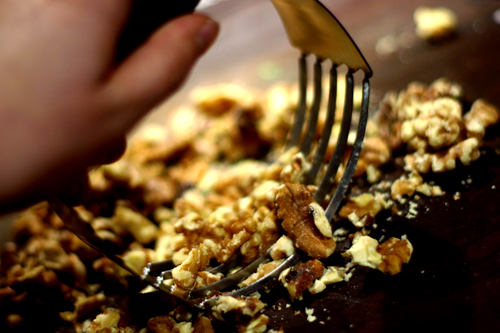
1) In order to avoid hearing "crunch, crunch, crunch" as you walk across your kitchen floor, chop the walnuts with a pastry cutter. It makes less mess than with a chefs knife, I think
2) Chop chocolate in a food processor. It may be noisy, but it'll save you the danger of doing it by hand (my knife always slips)


Old Fashioned Fudge

16 oz semisweet chocolate, chopped fine
2 oz unsweetened chocolate, chopped fine
1/2 tsp baking soda
1/8 tsp salt
14 oz sweetened condensed milk
1 tbsp vanilla extract
1 cup coarsely chopped walnuts

1. Cut 12-inch length extra-wide heavy-duty aluminum foil; fold edges back to form 7 1/2 inch width. With folded sides facing down, fit foil securely into bottoms and up sides of an 8=inch square baking pan, allowing excess to overhand pan sides. Spray foil with nonstick cooking spray

2. Toss chocolates, baking soda and salt in medium heatproof bowl until baking soda is evenly distributed. Stir in sweetened condensed milk and vanilla. Set bowl over 4-quart saucepan containing 2 cups simmering water. Stir with rubber spatula until chocolate is almost fully melted and few small pieces remain, 2 to 4 minutes

3. Remove bowl from heat and continue to stir until chocolate is fully melted and mixture is smooth, about 2 minutes. Stir in walnuts. Transfer fudge to prepared pan and spread in even layer with spatula. Refridgerate until set, about 2 hours. Remove fudge from pan using foil and cut into squares.

This was indeed some very good fudge, and relatively simple. I unfortunately left my on the stove just too long and the fudge ended up a little bit oily, but not bad. The texture was smooth and light, and I am glad I toasted the walnuts. Next time I'd use part unsweetened chocolate, as the recipe called for. I sliced my 8x8 pan into 7x7 cubes, yielding yummy bites of about 80 calories each. Not so bad - just don't have more than a few, and that'll be tough!

Saturday, January 06, 2007

They're all couples...duh...

Things accomplished since 2007:

- Bought our plane tickets to Rome (May 16th-June 6th) - Hurray!

- Wrapped all of my "Christmas" gifts that I still need to send...even though it's past New Years. Okay, I admit it, I still have a few more to wrap

- Wrote "www.RACHAELandGREG.com" on the back of our Save The Date / Invitation cards for what feels like the 1000th time (it's not), because we hadn't the foresight to get the website before the invitations

- Realized that we're inviting about 100 people and so I ordered 100 invitations and 100 envelopes and 25 insert cards for the 20 people coming to Italy. Even though... they're all couples... and we only need 50, 50 and 10. Duh. Let me repeat that. Duh.

- Watched a truly startling and provocative movie that I would encourage you to go see: Crash

- Made some uber-fantastic Red Snapper (see below)

Remember the drained whole tomatoes from last time I said I'd use in something else? Well I made a dinner out of it that was so delicious I actually surprised myself. And the darn thing is, I didn't take a single photograph of what I made. The risotto, while certainly good, was fairly traditional with white wine, crimini mushrooms, dried porcinis, asparagus and quite a bit of patience. Nothing too new there. But the red snapper was the best fish I've made in a long time, and the desert was... oh so perfect. I think what I loved so much about the whole thing was that, sans risotto, this romantic dinner was incredibly simple. I wouldn't say the individual components go together so well (creamy risotto with tomato-ey fish? Tomato-ey fish with chocolate desert? Eh, not the best combos), but on their own I really enjoyed these dishes.

Being vegetarian, I have a general obsession with All Things Slow Cooked, since it introduces a depth of flavor I don't get elsewhere. When I get a craving for beef or chicken, the only way to fill it is with something like 40 minute caramelized onions in broth. Yet this week, all I wanted was something fresh. Something broth-y and flavorful, salty, fishy, and tasting of the sea. The solution? Capers, olives, garlic, and onions and fish poached in liquid rather than in a pan. Oh, I can still taste it, and it was good.

I'll reconstruct the recipes for these last two items without any photos:

Red snapper in a garlic, caper and olive tomato broth

2 fillet red snapper
32 oz whole tomatoes, drained
2 cups fish stock
2 cups white wine (something lemmoney and dry... I used chardonay, which was a little too sweet)
1 sm onion, chopped
1/4 cup capers
1/4 cup whole black olives cut in half
5 cloves garlic, minced
1 tsp crushed red pepper
Salt and black pepper

1. Crush the tomatoes (I used a pastry cutter to do this) until they are in ~1/2" pieces
2. Add tomatoes, stock, white wine, onion, capers, black olives and garlic to a wide chef's pan
3. Bring to a a rapid boil and add fish on top
4. Cover, lower to a slow simmer and poach fish until flakey and tender (I used frozen snapper, so it took about 30 minutes)
5. Add red pepper flakes and season to taste

The only thing I missed in this was a handful of chopped fresh parsley, or maybe a little lemon.

Bailey's and Chocolate Coffee Cream (for 2)


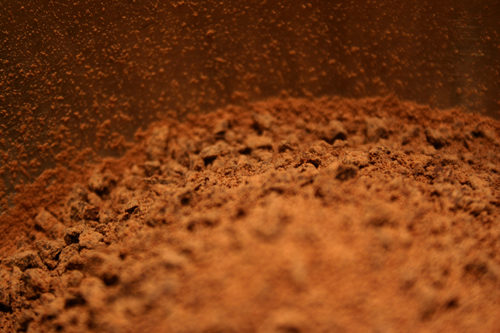
1/4 cup cocoa powder
2 tbsp instant coffee
2 tbsp sugar
1/2 tsp vanilla extract
4 tbsp heavy cream

2 shots original Bailey's liquor
1 cup 2% milk
Ice

Add heavy cream, instant coffee, cocoa powder, sugar and vanilla to a small food processor. Process until the cream it whipped. Shake Bailey's, milk and ice until chilled and frothy. Remove ice. Pour into appropriate glasses and top with the chocolate coffee cream, garnishing with a little extra cocoa powder or some chocolate curls.

Tuesday, January 02, 2007

Soup is way under-rated

Introducing...Nitro!


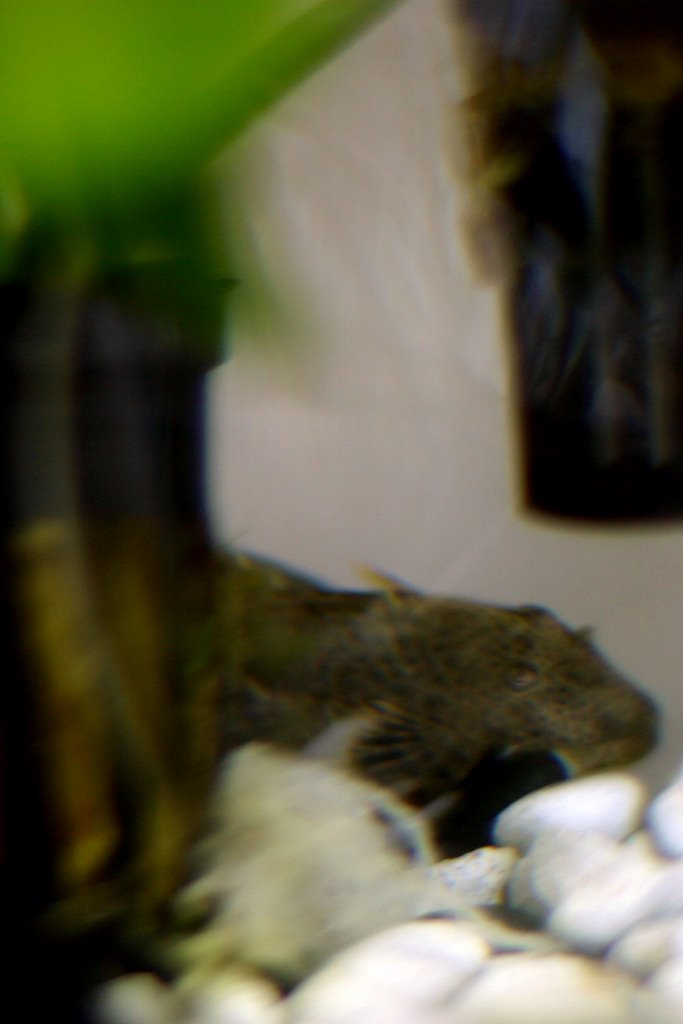
She is the most recent addition to my tank at work, and unfortunately I have not gotten a good photo of her yet as she scoots around the aquarium very quickly and is shy. Nitro is short for Nitrogen, and she is a Pleco, an algae eater who keeps the tank spotless. Carbon was a little weary at first: he kept sneaking up behind Nitro to observe her and then dashing away when she moved. They seem to be settling in just all right.

On to more important things... like cooking!

Soup is way under-rated.


What do you think of when you think of Soup? Everytime I think of Soup, I think of The Classics: tomato soup, chicken soup, vegetable barley soup, and matzoh ball soup (if it's around Passover). The Classics have endured for good reason - they're simple to make, have very few ingredients and are guarenteed to warm the soul. Everytime I make Soup from scratch, it's always the same reliable recipe: a little onion, a little carrot, some mushrooms and potato. Vaula. Classic Soup A-La...a little dull.

Yet the amazing thing about Soup, given how ho-hum its obvious form tends to be, is that it is a type of food with amazing versitility. Here are my praises of soup:

1) It's cheap
2) It can be lunch, dinner, side dish or main dish
3) Cooking Soup be a long, slow process (like French Onion Soup), or it can be put together in less than 20 minutes (like today's Soup)
4) It's a vegetarian's dream come true: vegetables, protein and whole grains all in one pot
5) People will accept flavor and texture combinations that they would never ordinarily allow (case in point below)
6) Talk about healthy
7) I live on the East Coast and it's Winter


I've been itching to make some soup these past few days, ever since Greg surprised me with a wonderful Christmas gift: a Le Creuset enamel cast iron french oven. Enamel cast iron cookware pieces are designed to do one thing exceptionally well: slow caramelization of natural sugars. This talent can be applied to three things: meat, risotto and soup bases. The only problem is... we have to wait for the right color to come in to the store. Until then I'll have to fulfill my soup cravings with a normal pot, all the while dreaming of the depth of flavor I'll soon be able to make. This got me thinking about Soup, and suddenly Soup was all I could think about. I had to make it. This recipe started off with a dream about vegetarian French Onion, which morphed into a chickpea soup in a clear broth with grated onion, which suddenly became chickpea soup in a light tomato base with carrot and cellery... which then took an unexpected culinary twist.


Recently I've talked (typed?) quite a bit about flavors that I don't like (all-spice and chipotle being two such Normally Offensive Flavors). Ginger's the third flavor that I don't like in my food. It always reminds me of holiday sweets, and it's just too spicey for my taste. I will even go so far as to ignore a cookie if it has ginger in it. But as I was concocting this recipe, the broth was just lacking something. It was so blah. I added carrots, onion, cellery, tomato juice, garlic, potatos, garbanzo beans, and still... it was really, really boring, and I was getting irritated that I couldn't figure out the right flavor. Then I saw the ginger. Having been encouraged by my recent encounter with chipotle chilis, I figured, "what the heck", and I started experimenting.


All I can say is that the flavors of this soup exactly fit my craving for something flavorful, filling and healthful. Grated onion mellows the flavor substantially. Using tomato juice with water lightens the stock. Garbanzo beans, bulgar wheat and potatoes provide hearty depth, texture and a little starch to thicken up the base. Finally, the ginger balances everything out (you can't tell me I'm crazy until you try it yourself). I topped mine with ginger cream and toast sticks; Greg chose grilled cheese for dipping. No one flavor is overpowering, yet somehow this soup manages to have a full taste all the same.


Soup Base:
1/4 c olive oil
2 cups vegetable stock
2 cups water
Juice reserved from a 32 oz can of whole tomatoes (save the tomatoes for something else)

Vegetables/Beans:
2 md onions, grated
2 carrots, grated
2 cellery stalks, grated
3 cloves garlic, minced
16 oz can garbanzo beans (chickpeas), drained and rinsed very well

Whole Grains:
1 cup bulgar wheat
2 red potatoes, cubed

Spices:
Plenty of salt and pepper to taste
1/2 tsp cayanne
1 tsp ground ginger
1 tsp poultry seasoning (blend of rosemary, sage and other spices)
3 tbsp dried parsley

Topping:
3 tbsp nonfat yogurt
1 tsp ground ginger

1. Combine the soup base ingredients and turn on the heat to medium
2. Add the vegetables/beans
3. Add the whole grains
4. Simmer for 20-30 minutes (meanwhile, toast the bread if you're me or grill the sandwich if you're Greg)
5. Add the spices and season to taste
6. Assemble and enjoy!