Monday, December 17, 2007

Pieces of Peace

bCRW_5991

This cookie recipe mocks me, I think. For I am a cookie-person: above anything else, I know and love cookies. Whether it's peanut butter, oatmeal, sugar or chocolate I am craving, I will make it happen with a little butter and a stand mixer. Just yesterday, a friend asked me if there was anything in that exact moment that would make me a happier person, and I said, "if I had a chocolate chip cookie, fresh baked out of the oven, in my hand, I would be happier." Not, "if my research was doing better", or "if I didn't worry about my family", or "if my husband and I could stop arguing about hanging shirts on the back of the bathroom door", or better yet, "if there was world peace" - no, all I wanted was a cookie.

Seriously. This is serious stuff. Especially because I knew that two days hence (tonight) cookies would be required for the cookie exchange that I had organized.

bCRW_5995

Tonight's loot

So this cookie, this cookie that I chose to make for my cookie exchange, for my craving of happiness, it mocks me. It will not slice right. It will not bake right. It will not keep its shape. It will foil my multiple attempts to make it. It will crumble into tiny pebbles of chocolatey goodness.

They're called "World Peace Cookies" because if everyone had one of these we might just all stop fighting. I'm renaming them World Piece Cookies, because they fall to so many pieces that everybody could have a bite if we just learned to share - and the making of these cookies surely didn't put me at peace. I don't have a solution to the crumble problem - which not everyone encountered (according to the others who made the recipe) - except to say that if the dough looks too dry, it probably is. Either bake it, and enjoy the flavor completely, or do what I plan to do next time, and reduce the flour by two tablespoons and stir in an extra two teaspoons of whole milk or heavy cream until things look "about right".

As for the problem of world peace? Well, I don't have a solution for that either, except to say happy holidays, and remember, for the people reading this blog at least, that small everyday joy is always within our reach - especially when you keep a supply of cocoa powder in your pantry door.

Recipe for World Piece Cookies

Original Source

bCRW_5981

Wednesday, December 12, 2007

Happy Hanukka, Chanukah, and Hanukah

bCRW_5977

When I was little, and the checkout lady at the grocery store would say "Merry Christmas" as we paid for the bill, I would snap back "Happy Hanukah!". Years later I learned to drop the sarcasm and would merely smile weakly instead. It's hard for the majority of America to remember that there are other cultures in their midst - can I really blame them?

bCRW_5967

I love Passover, with its careful rituals and symbolic food. I love Rosh Hashana, with apples and honey to ring in the New Year, and Yom Kippur with its solemn promise of new beginnings and holy requirement of the fast. I even love yarmulkes for their representation of equality, for which there is no holiday but that they make their presence at every holiday. My relationship with Hanukah is slightly more complicated.

bCRW_5975

Hanukah is a catch-22. When America wishes me a Merry Christmas, I am hurt that they have forgotten Hanukah. When America remembers and wishes me a Happy Hanukah, I am hurt that they have forgotten Passover. Hanukah, of all of the Jewish holidays, is the least important. Hanukah is what we Jewish people celebrate to prevent our children from celebrating Christmas. Hanukah, for me, has been an ironic joke: while I can appreciate the motivation behind the larger than life Menorah sitting out on the New Haven central park this December, I can also smile weakly and remember that America will never understand Passover, Rosh Hashana, Yom Kippur, yarmulkes, Sukkot, Mitzvahs, the Kiddush, or Shabbat.

bCRW_5976

So, this year, I am torn for celebrating both Hanukah and Christmas. I could analyze it all to death, I could try to "make a stand" and not light the Menorah this year, refuse a Christmas tree altogether, or tell the checkout lady really why her "Merry Christmas" bothers me, but honestly... when I put the candles in their right spots and I say the prayer, I am at peace. I am remembering my childhood, the little Menorah that was all mine, wax everywhere and the sound of the match striking its flame. I am remembering how many people I have explained the story of Judah and the Maccabees to, and how many times it all made our parents smile. Hanukah, whether I like it or not, is tradition, and I can smile with strength in knowing that on these 8 days, across the US, Jewish people are united in knowing we are not alone in what is generally speaking a mostly Christian nation.

bCRW_5964

Potato Latkes, a basic primer

Makes ~6 3" latkes


You can use any amounts you wish, and you can vary the type of potato and spices. Sometimes I skip the draining step and parboil the grated potato instead - those latkes will cook quicker and be more tender, but, having lost of all of their starch, they won't stick together very well.


2 starchy potatoes (Russett)

1 egg

2 tbsp flour

*Spices


*This Hanukah, I used 1/2 tsp salt, 2 tbsp stone ground mustard, and ~1 tbsp smoke paprika (perhaps to remind myself of my Hungarian roots). Alternately: salt, pepper, chives, onion, garlic, curry, sage, celery salt, etc. Anything tastes good with potatoes.


  1. Peal and then grate the starchy potatoes with a large box grater. Let the potato gratings rest for a few minutes. Squeeze out all of the moisture. Let them rest a few more minutes. Squeeze out every bit of water you can.
  2. Lightly beat the egg and stir together all of the ingredients with the potato gratings.
  3. Preheat a well seasoned pan on medium-high heat with a light layer of vegetable oil.
  4. Plop ~1-2 heaping tablespoons of Latke mixture on the hot pan and spread out so the latke is thin without having any holes. Don't touch the latke for at least 2 minutes (it needs to cook a bit to firm up). Fry each latke for at least 3-4 minutes on each side. It may take longer, depending on how large your potato gratings were - make sure to test a latke to be sure they are soft throughout.
  5. Serve piping hot** with chopped scallions, sour cream, applesauce, and, if you're me at age 13, ketchup.

** Latkes keep well on a cooling rack in a 200 degree oven.


Monday, December 10, 2007

How to make New England Iced Tea

Preferably on a blustery cold day, with raw wind and temperature below 35F

  1. Pour 2 cups boiling hot water into thermos
  2. Add tea bag of choice. Inhale the steam now - it may be your last chance - and seal the thermos.
  3. Take a 10 minute walk
  4. Upon reaching your final destination, sit down and enjoy the beverage. It will now be ice cold.

Wednesday, December 05, 2007

Eat your vegetables

bCRW_5922

7 years ago, when I first started my vegetarian ways, I started learning how to cook. I wanted things a certain way, with certain ingredients, in a certain amount of time with a certain cost. Sometimes those wishes are hard to fulfil all at once. Sometimes, what I succeed with in the ingredient list fails miserably in flavor. Sometimes? I'm just too damn picky. Nowadays I can usually see a train wreck coming. But sometimes, I expect a recipe to go very, very wrong, and I make it anyways.

bCRW_5940 bCRW_5939

Tonight's dinner was a lofty goal. It was to be comfort food, a dairy-free lasagna, and it and couldn't involve tofu, nuts or tomato sauce. I wanted to the first thing because it's below 30 outside. I wanted the second thing because, well, otherwise I'd regret it. And I wanted the third thing... just because I was feeling picky. I also needed to use up a pound of mushrooms. I mean, aren't they cute? Though, seriously folks, please wash your mushrooms. It might be pasteurized manure, but it's still manure! Flavor be damned - I choose not to knowingly eat dirt.

Er, anyway, traditional lasagna relies on a Bechemel sauce to add moisture between layers. It's a clever trick, because the creamy fat in the bechemel tames and binds together the other flavors without stealing the show itself. For a while now, I've been imagining a dairy-free lasagna that utilizes a Veloute sauce instead of a Bechemel. They both start with a roux (equal volume flour and fat - aka butter - cooked together); to make a Bechemel, add milk, and to make a Veloute, add stock. The Veloute would have a heartier but sharper flavor than a Bechemel would.

bCRW_5935 bCRW_5938

I struggled with the mushroom part. It's easy to overpower or cover up a mushroom flavor; it is harder to balance it, especially without cheese. Here, I used half of the Veloute for layering with mushrooms, and I pureed the other half with an equal volume of frozen peas. I reduced the puree on the stove, to give the lasagna a bit of structure, and assembled the whole thing with no-bake noodles.

bCRW_5945

I know: mushrooms, peas and no-bake noodles. You're expecting this to bomb, too, right? In fact, until the first bite, I assumed it had bombed. And then I took a taste of melt-in-my-mouth goodness: balanced, filling, structured, flavorful, all of it, this lasagna rocked. Greg, who is often skeptical of my vegan-style or dairy-free creations, raved. He called it Steak Lastunia. Meaty like a steak. Looks like a lasagna. Fills ya' up like a stew. Inventive name, no?

bCRW_5960 bCRW_5959

The whole thing wasn't super photogenic, but it actually looks lovely, delicate and very green in person. Served with a good salad and a grain or lentil based side, this is definite dinner-party material.

bCRW_5962

Okay, like, I just got up (at 11pm) and had a second helping. Greg says it was my third. Oh that's good.

Mushroom Lasagna with Pureed Peas

Serves: 4, if you have willpower

Ingredients:

About 1 pound assorted mushrooms, sliced to 1/4" *

1 small onion, chopped (~1/2 cup)

8 no-bake Barilla lasagna noodles**

3 cups stock

4 tbsp butter***

4 tbsp flour

1.5 cups frozen peas

1 tsp oregano

2 tbsp chopped flat leaf parsley

Salt and Pepper

*I used 2 medium portabella's, about 10 oz baby bellas, and several oz shitakes. The one pound total was already sliced and minus the stems (the portabella stems miraculously disappeared when I turned my back - err, Tori - and shitake stems aren't very good to eat)

**Or however many will make 4 layers in an 8x8" pan

***I could taste the butter in the final dish. If you want to go with less fat, reduce this to 2-3 tbsp and just cook the roux a little more carefully. It'll thicken the same.

  1. Preheat oven to 350F.
  2. Add 2 tbsp olive oil to large pan over medium-high heat. Add mushrooms and cook, stirring occasionally, until the mushrooms start to caramelize (about 10 minutes). Add onion and cook until translucent (~5 minutes)
  3. Meanwhile, melt butter in a saucier on medium heat. Whisk in flour until smooth, and cook the roux to a light, nutty brown color, whisking occasionally (5-10 minutes).
  4. Add stock to the cooked roux 1/2 cup at a time, whisking thoroughly between each step to prevent lumps.
  5. Splash the last tablespoon or so of stock into the mushroom pan to deglaze (scrape up the bottom to get all of the good bits).
  6. Reserve 1.5 cups of Veloute. Add peas to remaining sauce. Puree in the pan with an immersion blender or a transfer to a blender/food processor for this step and return to saucier. Cook over medium-high heat until the puree has reduced by ~1/2 (10-15 minutes).
  7. Layer the lasagna:
    • 1/2 cup Veloute
    • 2 noodles
    • 1/2 cup Veloute
    • 1/2 mushroom mixture
    • 2 noodles
    • Remaining Veloute
    • Remaining mushrooms
    • 2 noodles
    • 1/2 pea puree
    • 2 noodles
    • 1/2 pea puree
    • Parsley

7. Cover with foil and bake for 20 minutes. Remove foil and broil until lightly browned. Serve immediately.

bCRW_5929

Tuesday, December 04, 2007

A Chanukah Bush Just Isn't The Same

bCRW_5900        


My nose is stuffy, I can't stop sneezing, my throat's all scratchy, my ears are painful, I have to breath through my mouth, I walked two miles today in the wind and the cold, I worked many long hours this month but can't take any days off now, and we're really testing the minimum heat law in Connecticut with our thermostat set at 61 at night... but all of that goes away when I come home and see this:


 bCRW_5883

Because this Saturday, we picked out ornaments. And this Sunday, we drove to the farmer's market to pick up lentils for homemade stew and flour for homemade cinnamon buns, and then after that we steered our Volvo 240 Wagon to the cut-your-own-tree farm for the second bit of happiness. My new husband and I stood there, cradling our cups of hot cider, gazing at the vast fields scattered with Christmas Trees. All of the trees were different shapes, sizes and personalities. Some were tall and skinny, others were short and fat. Some were elegant, grand even, some were comfortable, some were in need of friendship and some were offering up their supple branches to the nearest passerby with a promise of heavily laden ornaments and tinsel. Then the snowflakes started falling, Greg quipped, "This is quaint", and with a mischievous smile and a squeeze of my hand, he pulled me off the in the direction of where our little Christmas Tree was waiting. It took us an hour to be sure, by which time our toes were completely numb and we had already walked back to our first choice. It was a pale, frosty blue looking tree, wider than it was tall, waiting for us like an old friend at the back of the room: it saw us before we saw it.


This day was unique, because I'm Jewish, and I'm from Arizona, and I've never had a Christmas Tree in my life. I have, however, throughout my childhood, stared longingly into windows of cheery homes, each with their carefully decorated conifers whispering of family together and things flavored with cinnamon. In my family, Christmas evening meant Blockbuster movie rentals; Christmas day was for deli meats off of a Costco Party platter or sometimes Chinese take-out. Every year on Christmas, I would imagine other families settled around the real or imagined hearth, enjoying a tradition that I couldn't be a part of.


But now that we have our little family together, Greg and I can make of these traditions what we will. For Greg, who was raised with many Christmas traditions, it reminds him of being a little kid, of growing up on a farm, and of feeling the love of his family around him. It reminds him that we both like to have a home with a real or imagined hearth ourselves. It speaks to our settled nature, our two dogs that we treat like children, and that at this time of the year there are things more important than work and the daily grind.


 bCRW_5887


For me, I've been living Christmas vicariously through Greg's memory and Greg's family without any traditions of my own to reference. So I don't have that childhood recollection to fall back on; my memories are of exclusion and denial. Now? Now I am included, now I am a part, now I am Jewish and I can decorate our home, bake cookies and wrap presents - not just for those around me, but for my own happiness as well.


bCRW_5862

 bCRW_5890bCRW_5886

bCRW_5897bCRW_5899

Saturday, December 01, 2007

Bread. Like, Six Weeks Later.

bCRW_5580

Now this is just ridiculous. After my last post about the bread starter (and my promise to give you the full recipe in a few days), I found myself so busy leading up to several weeks of travel that I just couldn't fit in the time to edit the photos and finish things up.
bbCRW_5843

But I assured myself, with 8 hours of travel time to a conference, 7 days to spend in San Diego, and 2 more hours on a plane, 3 days at home in Phoenix, and an additional 8 hours back to New Haven, I would finally write up my bread post, and a few more to boot (homemade oreo cookies, banana bread, pumpkin muffins, blueberry muffins, oh, there were baked things). I would make each post perfect, with beautiful photos, and I would be satisfied to indulge my hobby because I like doing this just because I like doing this - even if nobody ever actually read it or made the recipes.

bbCRW_5829 bbCRW_5830

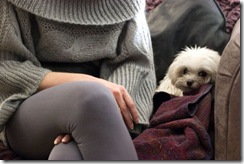
My Mom and one of her dogs (if a thing that tiny can be considered a dog - keeping in mind that my mother is only 5 ft tall, on the small side herself)

Well, there I was, on an airplane (err, times 5, with connections), all of my photos conveniently organized on a CF card, laptop fully charged, and, err... uhm. No bread book. No scrap paper with scrawled notes. And thus not a single recipe. Nice plan, eh?
bCRW_5803b

Then I figured: no problem. I'll get home, have a week to blog, and then at the very worst I'll just do it again on the 8 hour plane ride to Phoenix, the 6 days of Thanksgiving relaxation, and the 8 hour travel back home. Right? Yeah right. And then I got back home, and then I got sick, and blah blah blah blah.

bIMG_4492

I kind of feel like a loser blogger, especially since this is NaBloPo Month. Other bloggers have put me to shame!

Here's the basic idea. It looks scary, but I promise it's not. Start before 6pm on day one to make the poolish. Start at around 4pm on day 2 to have fresh, hot bread sometime around 8pm. It's really worth it. Total hands-on time, including cleanup? About 2 hours, maximum.

1. Mix the dough

2. Preferment

3. Stretch the dough, rise and stretch

4. Continue rising

5. Shape the dough

6. Proof

7. Bake
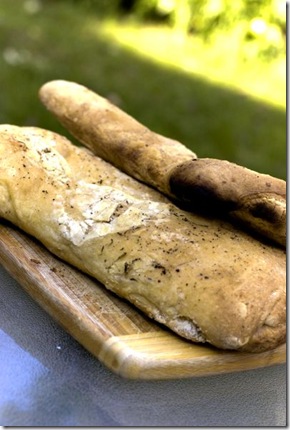
bCRW_5615

Ciabatta, Poolish Version

Makes two 1-pound loaves

From "The Bread Baker's Apprentice", by Peter Reinhart

(My notes are centered under the photos.)
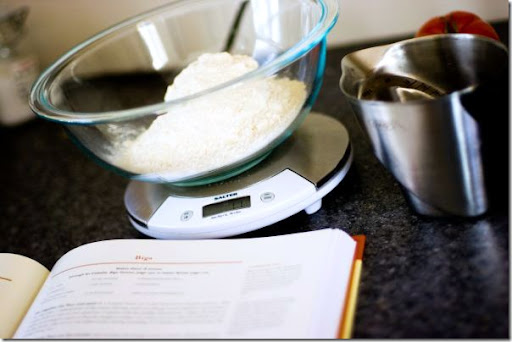
bCRW_5547

Ingredients

3.25 cups (22.75 oz) poolish

3 cups (13.5 oz) unbleached bread flour*

1.75 tsp (0.44 oz) salt

2 tsp rapid rise yeast

6-8 tbsp (3-6 oz) water, lukewarm (90-100) **replace up to 1/4 cup with olive oil
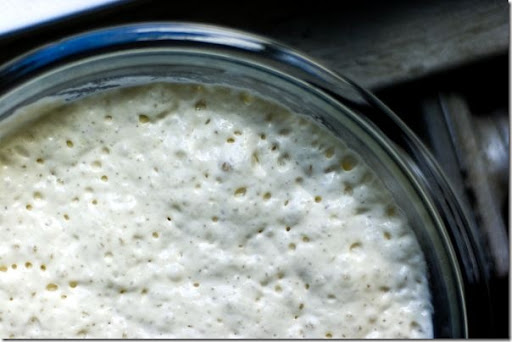
bCRW_5559

After the poolish ferments overnight, it looks something like this.

1. Remove the poolish from the refrigerator 1 hour before making the dough to take off the chill
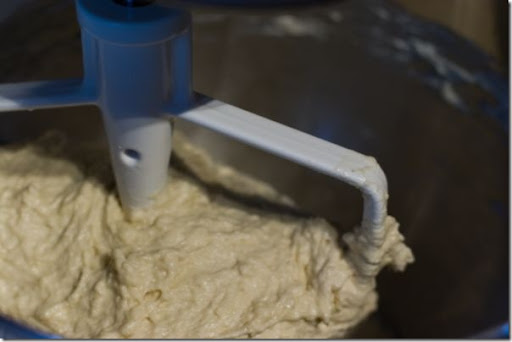
bCRW_5568

After mixing everything together just until incorporated: the dough will be sticky and lumpy.

2. To make the dough, stir together the flour, salt and yeast in a 4-quart mixing bowl. Add the poolish and 6 tablespoons of water. Mix on low speed with the paddle attachment until the ingredients form a sticky ball. If there is some loose flour, add the additional water as needed and continue to mix. Mix on medium speed with the paddle attachment for 5 to 7 minutes, or as long as it takes to create a smooth, sticky dough. Switch to the dough hook for the final 2 minutes of mixing. You may need to add additional flour to firm up the dough enough to clear the sides of the bowl, but the dough should be quite soft and tacky
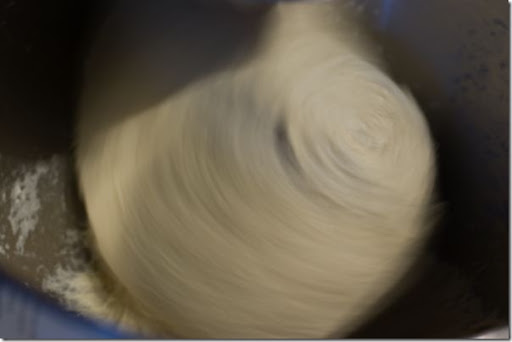
bCRW_5569

After kneading in an electric mixer for more than 5 minutes, the dough becomes smooth and pliable (even though it still sticks to the bottom of the bowl as the paddle turns - see lower left corner). The dough should clear the sides of the bowland you should be able to stretch a piece out thin enough to see light through (without the dough breaking).

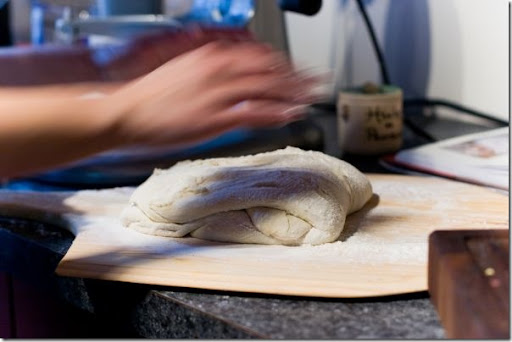
3. Sprinkle enough flour on the counter to make a bed about 8 inches square. Using a bowl scraper or spatula dipped in water, transfer the sticky dough to the bed of flour and proceed to stretch and fold: lift both ends of the dough with outspread hands and stretch until it is two-three times its original length, allow the dough to relax for two minutes, and then fold envelope style (one over the other back to the original size). Mist the top of the dough with spray oil, again dust with flour, and loosely cover with plastic wrap

bCRW_5577 bCRW_5578 bCRW_5579

Here's how you fold the dough.

4. Let rest for 30 minutes. Stretch and fold the dough again; mist with spray oil, dust with flour and cover. Allow the dough to ferment on the counter for 1.5-2 hours. It should swell but not necessarily double in size.
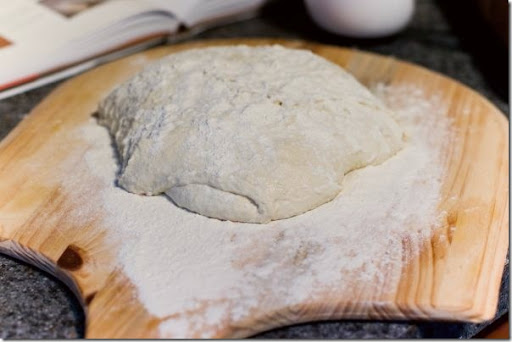
bCRW_5576

After the first fold, before rising. My kitchen is so cold that I turn the oven on to 180 for just a few minutes, turn it off, and then put the pizza peel in the oven to let the dough rise at somewhere around 90F.

5. Shape the dough as desired on a freshly floured surface (RWS suggestion: split into two or three loaves and carefully elongate; Peter Reinhart asks you to set up a couche -- too much trouble for me). Mist the top of the dough with spray oil and dust the dough with more flour, then cover the dough with a kitchen towel.

bCRW_5583 bCRW_5584

The first picture is after the 30 minute rise. The second picture is after the 2 hour rise. My oven temp was a little warm and I think the dough rose a too much (it deflated slightly when I moved it).

6. Proof for 45-60 minutes. (Meanwhile, turn on the oven to 500 degrees or as high as it will go).
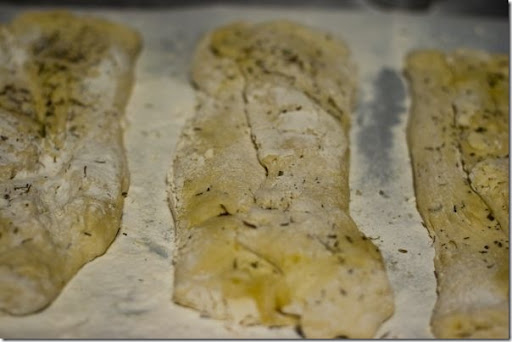

bCRW_5590

I chose to incorporate Herbes De Provence, a french seasoning that includes flavors like lavender. Those are the herbs you see sprinkled on top. I also drizzled extra olive oil everywhere. As I mentioned, this batch rose a little too quickly and then deflated a bit, so these "dough logs" are not as puffy as they should be... but it still came out fine.

7. Generously dust a pizza peel or the back of a sheet pan with semomlina flour or cornmeal and very gently transfer the dough pieces to the peel or pan (RWS note: I do step #5 on a pizza peel to avoid this transferring step). Lift each end up and tu the dough out to a length of 9-12 inches. If the dough bulges too high in the middle, gently dimple it down with your fingers to even out the height of the loaf. Slide the doughs on to a baking stone (or bake directly on the pizza pan). Pour one cup hot water into the steam pan and close the door. After 30 seconds, open the door, spray the side walls of the oven with water and close the door. Repeat twice more at 30-second intervals. After te final spray, turn the oven setting down to 450 and bake for 10 minutes (RWS note: my oven isn't good at staying hot so I leave it at 500 the whole time and still bake a few extra minutes). Rotate the loaves 180 degrees and continue baking for 5-10 minutes longer, or until done. The bread should register 205F in the center and should be golden in color (but the flour streaks will also give it a dusty look). The loaves should feel quite hard and crusty at first but will soften as they cool.
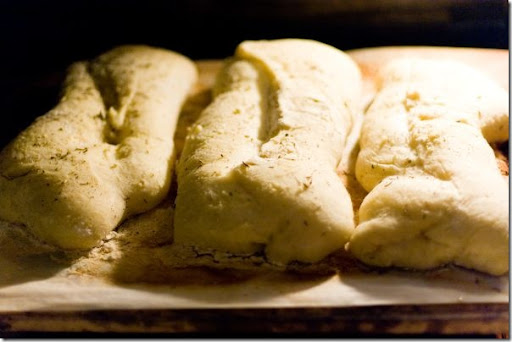
bCRW_5604

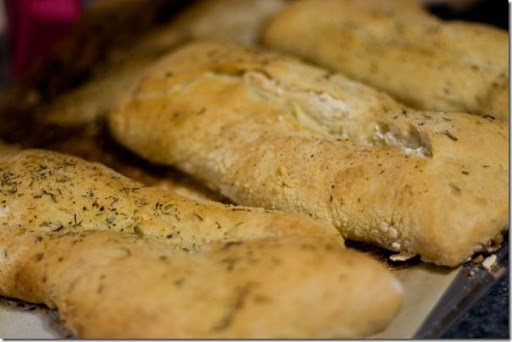
In the oven. Note regarding the whole water-in-the-oven thing: the aim here is to keep the external surface of the dough moist and pliable for the first several minutes in the oven, so that it can go through a final last rise (if the surface cooked too quickly, the dough could not become nice and puffy like you see here). It's kind of a pain but I think it's worth it. I use a small metal dish bought especially for the purpose (I actually cracked a piece of corning glass on my first attempt): I place the dish in the oven while the oven preheats. I fill a small spritzer with water, and then follow the directions carefully - being cautious not to hit any heating elements or the glass on the oven door (which could easily shatter. Be careful).
bCRW_5606

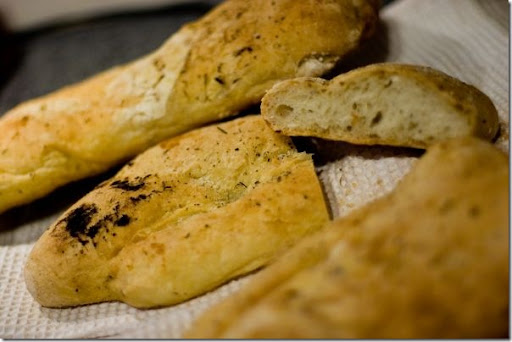
On the counter. Oh, it smells yummy!

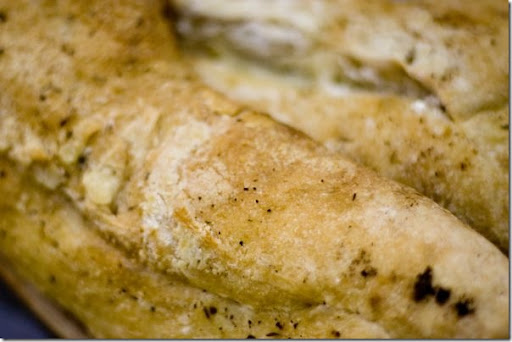
8. Transfer the bread from the oven to a cooling rack and allow to cool for at least 45 minutes before slicing or serving (RWS note: if you slice before this time, you will let steam escape and halt the cooking process of the loaf thus possibly destroying some delicate final flavors. But, you also get slice warm bread and melt butter all over it right away : ) ).
bCRW_5611

bCRW_5612