Wednesday, February 14, 2007

Let Me Count The Ways


I've always had mixed feelings about Valentine's day. Sure, it's commercialized. Sure, it's cheesy. Sure, I hated it when I was single and chalked it up to a money making crap of a day. But all the same? It is nice to have a perfectly ridiculous excuse for a lovely, relaxed and romantic evening with one's significant other. And such a day needn't involve overpriced flowers or bad chocolate - such a day can be romantic in its own simple right.

Smile

When Greg and I were trying to decide what to do for Valentine's day, the first thought was to have a special meal at home. But I cook so often, it just wasn't appealing to me. Then we thought, let's go out. But the prix fixe menus turned us away. Finally, Greg came up with a great idea: he made me dinner instead.

Spanish White Wine: Really Good

I give great kudos to The Boy Who Does Everything. From hard wiring fog lights on his car, to redirecting plumbing lines, to replacing the entire exhaust system on my car, to digging up the main sewer line under our house and repairing it, to buying a tile cutter and tiling our bathroom, (all without having any experience with any of things before attempting them), to being successful in his career and family life, to being a kind and caring person at heart... he literally does it all. If he doesn't know how to do it, he figures it out how, and he does a better job than anyone else could. I could write pages about what an amazing guy he is in the practical ways, and that doesn't even begin to touch on what a great partner he is.

So on top of all of this talent in the ways I've gotten used to him being talented about, Greg, who doesn't cook much (though when he does, it's always good), decided to make Valentine's Day dinner while I sat on my bum in the living room. Whata' guy : )

First course: amazing fried oysters. He breaded them in pancake batter with various spices and used the Le Creuset to bring them to a perfect brown, served with a horseradish dipping sauce. They were, quite frankly, amazing. I've never had oysters, but if he'll make them this way, I could eat them every day.

Pancake Batter Fried Oysters with Dipping Sauce

Next came the main dish: lemon dill pan fried salmon with herbed potatoes. It was light but filling, herby and buttery. Paired with a bottle of Spanish white wine, it felt like summer by the sea in February.

Main Course: Lemon Dill Pan Fried Salmon and Rosemary Red Potatoes

I was in charge of dessert. For a Salmon dish, I decided on a dessert I had recently at Greg's company Christmas Party, held at an upscale French restaurant called Union League: poached pears. I poached the pears in Riesling wine and vanilla based on Alton Brown's recipe, with a little added sugar for sweetness.

What I'm really proud of, however, is the homemade caramel sauce. I wanted a soft, creamy caramel sauce to serve over fragile, poached fruit and ice cream. That sounded like heavy cream should be involved, but I didn't have heavy cream last night and I couldn't find a recipe I liked. Thus, I started with a basic sugar caramel and tried some things till I figured it out. The right ratio of butter and coconut milk did the trick. It was creamy, smooth, and the perfect texture to go on top of the pears. If you don't like the flavor of coconut, don't worry - you can't taste the coconut here, it'll just be creamy.

This dessert was really, really good: ice cold pears, rich vanilla ice cream, reduced wine sauce the bottom of the bowl, and hot caramel sauce to pour over top.

Poached pear out of focus on the left, vanilla ice cream our of focus on the right, and delicious creamy caramel right in view

The highlight of the whole night was when Tori wanted to see what was in a paper bag, and Greg gave it a little nudge to wedge the bag onto her face. She proceeded to stumble around the kitchen and then ran into the parlor to say Hi to me with a giant paper bag over her face, smashing into walls and tripping over her own paws. Moments like those are ones that remind me of what it is that I love about her silly, food loving, uncoordinated self.

Having finished dinner, dessert, and a bottle of wine, suddenly it seemed as if, okay, "that was really nice. This feels so nice and normal". Then I realized the kinds of lives we are fortunate enough to lead. Greg and I sit down to a romantic dinner at least 4 times a week. We go out once or twice a week. We watch movies together and hang out together almost every evening. We take the dogs to the park and come home to the home that we've built together.

Thanks, Greg. Love ya'.

Nothing left but melted ice cream and a pear stem!

Poached Pears in a Riesling Vanilla Sauce
Serves 2

1 bottle Riesling Wine
1 cup sugar
2 tsp vanilla extract
2 Red Bartlett Pears

  1. Find a saucepan of the right size to provide depth to submerge the pears. Bring the wine, sugar and vanilla extract to a slow boil.
  2. Meanwhile, peel skin from pears and slice in half. Remove the core from the entire length of the pear
  3. Add pears to boiling poaching liquid and poach until almost cooked through (depending on the ripeness of the pear, 10-30 minutes).
  4. Remove pears and reduce poaching liquid by one half. Cover pears with reduced poaching liquid in a small bowl and chill at least several hours, or overnight

Coconut Caramel Sauce
Makes, quite a bit

2 tbsp corn syrup
1.5 cups white sugar
Just enough water to cover
Pinch salt
1/4 cup unsalted butter
3 tbsp coconut milk

  1. Add corn syrup in a dollop to the bottom of a small saucepan or saucier. Pour sugar into the pan and add just enough water cover the sugar. Turn heat to medium and observe the sugar careful. Do Not Stir! Instead, use a pastry brush dipped in water to brush down the sides of the pan (this will prevent recrystallization of the sugar solution before it caramelizes, something that would ruin the caramel).
  2. The sugar will not caramelize until the water evaporates off, but once this occurs it will start turning a golden color. As the color gets darker, lower the heat (there is some carry-over cooking that occurs, since both the sugar solution and the pot hold on to quite a bit of heat). Once the caramel deepens to the right color, turn off the heat completely and stir in the butter and coconut milk.
  3. Be careful. Caramel is very hot and can be dangerous.

Poached Pears with Ice Cream and Caramel Sauce

Serve one pear with a scoop of ice cream, a few spoonfuls of reduced poaching liquid, and hot caramel to top. Enjoy.

Monday, February 12, 2007

Crumble Pie

*My CF card's almost a gonner and my harddrive is full, so until my new external harddrive and working CF card arrive, I'm limiting the number of photos I take to the end result...sorry bout that...should be back to normal soon...

The funny thing about keeping a food blog (and reading others' blogs) is that it makes me realize all of the different kind of foods that I just don't like. I just don't want to eat what I don't want to eat. That's it. I'm a food snob. I am a picky-eater. Fastidious in my food fancies. I am grade-A-annoying-to-feed.

Am I really a picky eater? Am I so bad for disliking a few foods? There aren't that many, I don't think... Foods like:
  • - Chipotle
  • - Ginger
  • - Tumeric
  • - All-spice
  • - Tomatoes that haven't been cooked first
  • - Cucumbers with seeds
  • - Jello
  • - Most vinegars
  • - Soup from a can
  • - Pasta cooked more than 1 minute over al dente
  • - Cooked fruit, or, for that matter, jarred fruit matter containing intact items
  • - Mango
  • - Anything that has meat in it
  • - Overcooked green beans
  • - umm...
Okay. You've got me. I better loosen up... yikes. I have been doing my best to shorten that list, by the way, but sometimes it feels like I haven't made a dent at all. Thus I often snag items in the grocery store or earmark recipes that describe food items I normally wouldn't enjoy.. Which actually brings me to today's topic: white chocolate, or, That Other Thing I Don't Like. After seeing this adorable recipe on Deb's blog, I felt an urge to recreate it. Also, we've been eatin' pretty healthy these days (sort of, or rather, I'd like to think so), and that generally leaves me with a craving for a cookie and the self satisfied feeling that I deserve one. The original recipe described lovely, crispy green tea shortbread cookies cut into cute little green leaf shapes and sandwiched with a white chocolate ganache.

That's the one. White chocolate. Bleg. Buttery, smooth, flavorless most of the time. White chocolate always seems to lack something - yet, I had some that had been sitting neglected in my pantry for quite some time, and in the green tea shortbread recipe described, it sounded all sounded so yummy. Imagine the texture: buttery smooth ganache + crispy, frail cookie. Imagine the flavor: delicate green tea with a subtle influx of dull, soothing cocoa butter. Mmmmmmmm. Perfection.


The only trouble was, I lacked green tea powder. And also didn't have cute little green leaf cookie cutter. Darn. I decided instead to go oreo-chocolate-style cut into wedges from a cake round, with a recipe from epicurious that I really should have known better than to get past first base with. Everyone booed it, saying the flavors could get bitter and the dough just fell apart when cooked. Only 50% said they would bother making it again But I persevered: I was determined. I had faith in the appealingly straightforward recipe, with its teasing claims of "sublime and delicious!" or "these shortbread were divine" that somehow masked the "this turned out terrible" and "crumbling to unservability". That wouldn't happen to my dough, would it? My dough would be perfect. I could fix it!

Ha. Told ya' so.

3 hours and a failed shortbread recipe later, I was left with two 8" rounds and a blob of chocolate I hadn't yet melted. The first round was intact but I daren't remove the shortbread. I already destroyed the second round, having pulverised it to a fine crumble after a few well intended inversion attempts.

This is when invention struck. Could I use the ganache as glue? Maybe it would hold together the broken crumbles into something edible. I melted the white chocolate, stirred in some light cream, tempered it and poured it over the intact base. I tapped out all of the air from the mixture, allowed it to cool for several minutes, then sprinkled my shortbread crumbs atop the mess.


The result? Surprisingly all right, and a lesson learned to listen to epicurious reviews. I present to you a little bit of Crumble Pie. It reminds me of a sweetened condensed milk chocolate cake a coworker of mine often makes (known as the Better Than Matt Damon cake, since in her family they couldn't use the Sex word). It was a little too sweet with so much white chocolate ganache oozing all over,but balanced when you get the right portion of chocolate crumble on the fork. I'd encourage you to try to fix this recipe rather than duplicate it! Unless, if you're craving something very sweet and buttery, go for it. The absolute best part was sweeping up the crispy chocolate and gooey white chocolate bits with the tart strawberries. At the very least, Greg and I polished our plates.

Chocolate Shortbread Crumble Pie
Serves 10

1 cup (2 sticks) unsalted butter
1/2 cup powdered sugar
1/2 tsp vanilla extract
1/4 tsp salt
1.5 cups (185g) all purpose flour
1/2 cup unsweetened cocoa powder
1 tbsp instant coffee powder *
2 tbsp corn starch *
9-10 oz white chocolate, chopped into bits
8 tbsp light cream

  1. Using a mixer fitted with a paddle attachment, cream the butter for several minutes, or until butter has aerated and lightened in color. Scrape down the bowl at least twice.
  2. Add powdered sugar, vanilla and salt. Continue creaming for another 3 minutes. Scrape down the bowl at least twice.
  3. Sift together the flour, cocoa powder, instant coffee and corn starch. Pour dry ingredients into mixing bowl, then continue mixing by hand or on low speed, just until ingredients are incorporated
  4. Chill for two hours, then divide evenly and press into the bottoms of two 8" round cake pans. Bake in a 325 degree preheated oven for about 20 minutes, or until set through. Remove and cool completely.
  5. Meanwhile, melt chocolate in microwave (small 15 second increments) or double boiler. Stir in warm cream and whisk until incorporated.
  6. To make a little crumble pie, stir up one round until shortbread is crushed evenly. Pour chocolate mixture over intact base, given several rough taps against the counter (to remove air bubbles), and pour in shortbread crumbles. Cool completely before serving; dust with cocoa powder and powdered sugar for decoration
* The recipe advice on epicurious called for the addition of 2 tbsp corn starch to help overcome the crumble problem. I'm convinced the maker of the recipe measured, not weighed the flour, as I was very precise with my flour measurements and chilled the dough quite thoroughly before baking. Ultimately, the recipe is flawed. (Shoot, I really need some more of that crumble pie -- and no, the pun will not get old)

Sunday, February 11, 2007

Pot-sticking Sesame Tofu

My camera memory card appears to be failing me, so all of the photos I took of the prep for the filling of this dish were lost! Hope to get a new card soon...

Potstickers "frying" in water, not much oil...

Having read about these yummy steamed dumplings on The Village Vegetable's blog, I found myself with a craving for them all week long. I tend to be intimidated by cuisines that I don't know much about - Asian, Mexican, and Indian food, for instance. I love eating almost every type of dish in all three of these ethnicity's, yet when it comes to making them myself'? I'm scared of not doing it justice. There's nothing worse in my mind than melting pot of American food, where we feature Chinese food that's full of syrupy, thick and all-too-sweet corn syrup, or Mexican food like Taco Bell. What's wrong with us? Why can't we get it right? And is this really what good (different) food tastes like?

I often feel that it's a shame we can't do other cuisines better justice in this country. Whether it's because American taste buds require American food, or it's because the chefs that make that kind of bad spin on Anything Not Deep Fried simply aren't being conscientious and respectful cooks... it annoys me. And it makes me very reluctant to dabble in making food that I don't know much about.


That said, I branched out for these steamed dumplings. I just wanted something that tasted good, and those Asian inspired flavors? I could not get them out of my head. I needed to make something Asian, whether it was a legitimate dish or not. (Today's feature will only be about the dumplings, but I'll make another post soon about the Thai-inspired Lemon Lemongrass soup I made to go along with these.) With respect to these dumplings, I wanted a lot of tofu and I nixed the cabbage. I enjoy the flavor of raw or slightly cooked tofu, and I'd like to bring it into more of the dishes I cook. Thus, I pureed a good portion of tofu with some green onion, mushrooms, red pepper, carrots, hot chili paste and peanut sauce. After briefly cooking the vegetable mixture, I stirred in sesame seeds for some good texture and stuffed won ton skins.


Lastly came the frying. I have a special cooking technique for dumplings when I don't want a lot of oil but want something a little crispy (and not just steamed). I take a non-stick skillet with a very, very light coating of oil (I soak a paper towel first, then wipe the surface of the warm skillet). I dry-fry the dumplings for a minute on each side, then add a splash of soy sauce and a few tablespoons of water. I let the water boil away and then do a final crisp-up of the potstickers in the now-dry nonstick pan (don't do this for too long or you'll get burnt Teflon in your food... just long enough to crisp the outer skins). The water steams the dumplings, thus cooking them the rest of the way through, and the boiled off soy sauce helps buy up a nice crispy crust without a lot of oil.


I really loved this recipe - Greg and I ate them on Friday night and on Sunday night, and we'll have them for lunch tomorrow as well. The recipe is a little time consuming (to stuff 60 Wontons), but it is also very simple. It's light, flavorful and the leftovers can be frozen for later cooking. I think these would be almost as good steamed instead of the bit of frying I did, though the frying hardly adds any fat. I used pre-prepared Thai Chili and Peanut sauces I had on hand... of course, you'll have to fiddle with the amounts to get a good flavor based on your own sauces. I liked that the base was primarily tofu and mushrooms, and in terms of flavor, the spicy-peanuttiness of this was dead on.

Enjoy.

Tofu Sesame Seed Potstickers
Makes ~60 Wontons

6 oz Tofu
2 large portobella mushrooms
1 cup baby carrots
1/2 red bell pepper
2 cloves garlic
2 tbsp green onion, roughly chopped (white portion of the green onion)
3 tbsp sesame seeds
2 tbsp Asian peanut sauce
2 tsp Asian hot chili sauce
Splash of soy sauce
Splash of rice wine vinegar
1 Package Wonton Wrappers (60 sheets)
Sauce for Dipping *
  1. Roughly chop all vegetables
  2. In whatever batch size necessary for your food processor (mine only holds two cups maximum, so this took 4 batches), puree the tofu, mushrooms, carrots, garlic, green onion and red bell pepper to a fine mince.
  3. Cook over low heat in a nonstick skillet for about 5 minutes - or, long enough to soften all of the vegetables
  4. Stir in sesame seeds and flavorings.
  5. Fill Wonton wrappers with about 3/4 tsp mixture each, sealing edges with a finger dipped in water. Either fry as potstickers (technique described above) or steam for several minutes. Extra potstickers can be frozen for up to 3 months**
* I've made a few sauces to go along with these. Frankly, anything is good. Here's my favorite:
1/4 cup soy sauce
1/4 cup rice wine vinegar
2 tbsp peanut sauce
2 tbsp hot chili sauce
2 tbsp sesame seeds

As you can probably see in the picture up top, I also used a version of this (without chili sauce or soy sauce) for salad dressing!

** Tip: freeze wontons on a flat sheet first, then place in plastic bag. This way they won't stick.

Thursday, February 08, 2007

Starting...now!


Finding fresh grocery food in Connecticut is harder than one might think. When I first moved here, I came without a car. Big Mistake. Although New Haven is a small town, it is a college town that is designed to cater towards one population only: its undergraduates, a category of often well-to-do persons that I am not a member of. Culinary options are varied, true, with a wide selection of wonderful restaurants and more than a few really good take-out joints. There is, however, a severe lack of grocery markets within the city, and even when one owns a car, there remains to be a found a grocery that gives a happy medium between healthy, yummy, and affordable. We have the following:
  • Gourmet Heaven - The only in-town market. I once bought a half pound of Land-O-Lakes Butter for $7.50, because I was desperate for a homemade cookie
  • Nica's Market - great fresh produce and Italian prepared food, but pretty much nothing else
  • Shaw's - AKA Ghetto Shaw's, where the police have several permanent parking places and generally stand guard over the cashiers at night. The checkout people also enter in your "OKs" on the credit machine, thus approving a purchase before you've even seen the total
  • Edge of the Woods - all vegetarian and vegan. Uber, uber healthy
This week we needed granola. Yogurt. Seitan. Tofu. Barley. Organic oatmeal. Greens. AKA All Things Vegetarian and Fiber Filled from Edge of the Woods. No fish. No cheese. Nothing of the sort. It's time to feel healthy again! Of course, by the time I completed my Healthy-Food-Splurge Shopping Trip, I was absolutely starving and needed something really quick. Sooooo... I breezed over the salad greens and went for a quick meal I've been craving ever since I read about it on another blog.

The idea for today's recipe came from Heidi's 101 Cookbooks. I used an entirely different sauce since I didn't have curry paste, but it was the same concept: mix leftover noodles with a spicy
Asian inspired egg mixture and fry until golden brown. Ah, is that actually healthy, you say? Fried? I say, it's better than a lot of things I've been eating recently. Plus, there's no oil in the pan. It might be a carbohydrate filled dish, but it's flavor packed without much fat, except some olive oil and a little peanut oil.

Besides, I'm easing back slowly into healthy track.
Fritos to Tofu would just be too much of a shock to my salt saturated system...I'll be making healthy food this week, I swear... (starting tomorrow)


Asian Noodle Patties
Serves 2 as main
Serves 4 as snack or small side

2 tbsp soy sauce
1 tbsp peanut butter
1 tsp brown sugar
1 tsp corn starch
2 tsp hot chili pepper oil
2 eggs
1/2 red bell pepper, cut into thin strips
3 green onions, sliced
1 clove garlic, grated
1" lemongrass, grated
2 tbsp chopped fresh cilantro
pinch salt
(several) pinches
Cayenne, if you like spice
2 cups cooked noodles

  1. Whisk together soy sauce, peanut butter, brown sugar, corn starch, pepper oil and eggs.
  2. Stir in red bell pepper, green onions, garlic, lemongrass, cilantro and spices.
  3. Fold noodles into sauce.
  4. Fry individual servings in a non-stick pan: 5-7 minutes over medium heat covered with a small plate to help set the egg on top, flip and cook for an additional 5 minutes on the other side, and finally cook for 2 more minutes on high to brown up.

*I like lemongrass, so I peeled the stalk apart and boiled the pasta with it. I could taste it quite nicely in the pasta, however, the flavor was masked by the peanut butter in the final product

**Heidi formed her's in egg rings, which I do not own. First I tried a freeform patty, which led to a scrambled noodle mess. Then I poured all of the mixture into one small omelet pan like a frittata, which worked like a charm. Be careful to loosen the edges of the patty with a nonstick spatula and have it freely moving before flipping. Slide it onto a plate, then place pan over plate and flip. Heidi also used very thin noodles, which I think would work better than what I chose. Basically, I'd try her recipe first unless you don't like curry... this one was only "so so"

Tuesday, February 06, 2007

Reverse Pyschology of Corn Chip Curves


There was some "gooood" food happening this superbowl weekend. I say "gooood" because it depends on your definition of good. The food was certainly none of the following: healthy, fresh, fiber or vitamin filled, unique, or unprocessed. The food was, however, all of the following: fattening, cheesy, flavorful, salty, and oh so craved. Basically, it all involved beans, cheese and corn chips. Almost everything came out of aluminum of some sort, and it all ended up spicy.


To spare you all the dredges of typically yummy football fare, I'll provide only two recipes instead of the whole lot. The first is entirely of my own invention, something I'd like to call a Reverse Jalapeno Popper. Are you intrigued yet? I was hoping the word reverse would make things interesting. I wanted to make poppers, but I didn't want to deep fry anything. Instead of stuffing the jalapenos with the cream cheese, I put the cheese on the outside and the jalapenos on the inside in a baked casserole sort of a dip. The resulting creation tasted amazingly like real poppers. It saved me such a quantity of time and such a would-be mess that I don't even want to think about ever making real poppers again. I think it's a dish even Rachael Rae would be proud of.


The second dish wasn't anything terribly atypical, but I thought I'd share the recipe for three reasons: (1) it involved the Le Creuset in a prepare-ahead-of-time way that I liked, (2) in case you ever need a recipe for chili to feed 14, here it is, and (3) I have now met several people who have no idea what Frito pie is. If you don't know what Frito pie is, keep reading.


Frito Pie pie is simple perfection: chili spooned over Frito corn chips. It's crunchy, corny, salty and spicy. I'm not even a person who usually eats Frito's, or really even any kind of bagged dipping chip (the all-that-is-holy-tortilla-chip aside). I can't remember the last time I had Frito Pie - it's been quite a while - but it's the sort of comfort food that's perfect for cold weather, and even more perfect for a Superbowl party.


When thinking about a chili recipe, I wanted something that would work well with the big Frito dippers I brought back from the grocery store - i.e., a primarily smooth base. Any chunks of vegetables needed to be the right size to fit in the corn chip curves, so I used a food processor to mince most of the ingredients, but I reserved the peppers and some of the onion to keep the texture interesting. It needed to be veggie, of course, which required beans. I finally took the plunge and decided to soak up some dry beans from scratch (usually I just use canned, especially for smaller portions), and I was rewarded with wonderfully creamy and flavorful pinto beans. It was definitely worth the small trouble. Canned black beans added a little variety and color. I added both fresh jalapenos for some bright spice and a dried chipotle chile for a little heartier depth (I'm working heard to enjoy this flavor... and also to use up the box of dried chipotles sitting in my pantry...), and beer to round out the deeper flavors. Finally, I think the most important part of a tomato based anything is using good quality canned tomatoes. Find a brand you like and stick to it. The longer you cook the tomatoes, the sweeter and heartier they'll get.


I'll admit that Greg and I have been eating like....well, we've been eating like Tori, lately. She's the only good analogy for it. Even though I'm full, I'm still snacking on the cookies... the chips... the dips... the soda... the Frito Pie... everything that is left over from our party on Sunday. If I see it, I seem to be eating it. I promise something a little more fresh and healthy for next posting's recipe, even if I haven't made it, or, even thought about it, yet!


Reverse Jalapeno Poppers
Serves 4-10

4 tbsp butter
6-8 fresh jalapenos
1 cup bread crumbs
1 tbsp salt
1 tbsp pepper
1 tsp Cayenne pepper
16 oz cream cheese
1 egg
2 tbsp mayonnaise
  1. Preheat oven to 350 degrees and start a heavy bottom skillet on medium heat with the butter in it (heavy bottom so as to avoid burning the jalapenos)
  2. Slice the jalapenos lengthwise. Using a small spoon, carve out the seeds and scrape any remaining white parts. Slice into 1/4" half rounds. Add jalapenos, bread crumbs, salt and pepper to skillet and fry for several minutes, until bread crumbs are golden brown and jalapenos are soft.
  3. Meanwhile, add cream cheese, egg, Cayenne and mayonnaise to a food processor. Puree until smooth.
  4. Pour cream cheese mixture over jalapenos and bread crumbs in a small ovenproof dish. Bake for about 30 minutes, or until set in the middle
  5. Serve warm with tortilla chips.
*I only had 2tbsp of mayo at hand, though both Greg and I agreed this needed a little more moisture. I'd suggest 4 tbsp of mayo instead.


Vegetarian Chili for Fourteen
Serves: 14, I think

4 large onions*
2 red bell peppers
2 green bell peppers
1 head celery
2 cups baby carrots, or 3-4 medium carrots
1 head of garlic
1/2 cup olive oil
4 cups vegetable stock

3 fresh jalapeno peppers
1 dried chipotle pepper
4.5 oz jar McCormick's Chili Powder
32 oz black beans (canned)
1lb pino beans (dry)
32 oz crushed tomatoes
32 oz whole plum tomatoes in their juices
24 oz good, dark beer
Plenty of salt and pepper
Additional Cayenne if desired
Sour cream and Fritos for serving

  1. Prepare the soup base the night before. Roughly chop all of the vegetables, reserving the chopped peppers and half of the chopped onion. Add the remaining half of the onion and all of the celery, garlic and carrots to a food processor in batches. Process until finely minced. Add all of the minced and chopped vegetables to a dutch oven with the olive oil and bring to a medium heat. Cover and cook for 10 minutes, or until the vegetables are softened throughout. Remove cover and cook for an additional 20-25 minutes, or until the onions develop a brown color and start sticking to the bottom of the pan. Deglaze with vegetable stock. Take off the burner and cool before placing in the refrigerator overnight.
  2. Add water to cover the pinto beans and soak overnight
  3. Reheat soup base from the previous night and add tomatoes. Rehydrate chipotle in a small volume of water and mince with the fresh jalapenos. Add peppers to soup with chili powder and allow to simmer for about an hour
  4. Meanwhile, rinse soaked beans very well and add to a separate pot with water to cover. Bring to a low simmer and cook until softened, about an hour.
  5. Add cooked pintos and canned black beans to the chili, cooking for an additional hour. Season with plenty of salt and pepper. Add beer and simmer with the cover off for an additional 10 minutes.
  6. Season with plenty of salt and black pepper, with additional Cayenne if desired. 10 minutes before serving, stir in beer. Serve over Frito's with sour cream on top.
*I used two red and two yellow onions, but in retrospect I think all yellow would be better.

Friday, February 02, 2007

Garden of Eatin'


When I was an undergraduate at Arizona State University, my two good friends and I formed a trio of homework problem-solvers - not that we actually finished any of the homework problems, but we certainly spent a lot of time pretending to. We often needed somewhere to sit other than the library (an awful place where they didn't allow Cappuccinos or Laughter). One of our favorite places to go was a little cafe just on the outskirts of campus. There, they had the best vegetarian sandwich I've ever ever had. The sandwich was called the Garden of Eatin', and it Eden indeed.


The sandwich started thusly: cream cheese spread over toasted whole grain bread, piled with sprouts, tomatoes, cucumbers, provolone, and, quite the best part of all, a splash of Italian salad dressing. The salad dressing would drizzle down through the vegetables and soak into the bread, ensuring a juicy, flavorful mouthful with every bite. It was always fantastic, and we always ordered the same mocha espresso drinks to go alongside. Mmm, memories. After I graduated, I heard they closed the cafe and turned into a meat deli. All good things must, well, you know... but I do hate to think of our lovely little vegetarian cafe serving up slabs of beef and racks of ribs.


From that point onward, whenever I found my vegetarian sandwiches needing a little something extra, I headed to the salad dressing. Now, I often drizzle extra virgin olive oil and balsamic or red wine vinegar over sandwiches and wraps - it adds the fat, flavor and moisture that veggie sandwiches so frequently crave.


Recently Greg and I have been enjoying an assemblage of vegetables that goes by no other name than "That awesome sandwich", and I present it to you here in all of its glory. It's refreshing, filling, flavorful, and full of bursts of tangy flavor. The secret? Really, really sharp, well-aged Cheddar, and the splash of lemon juice on the avocado. Think of it as guacamole without a bowl.

"That Awesome Sandwich"
(AKA, "Rachael's Garden of Eatin' Sandwich")
Serves 2

4 slices of whole grain bread
2 tbsp freshly chopped flat leaf parsley
2 tbsp freshly chopped green onions
3-4 tbsp Mayo, depending on the size of your bread and Mayo preference
2 tbsp grainy Dijon Mustard
1 Meyer Lemon
1 Haas Avocado
1/2 Red Onion, sliced thin
4 oz very good, very sharp and crumbly Cheddar cheese, sliced thin
Green leaf lettuce
Olive oil, or salad dressing of your choice
Salt and pepper

  1. Start the bread toasting. Meanwhile, prepare the vegetables
  2. Stir together mayonnaise with parsley and green onion. Spread half of the mayo mixture on one slice and half of the mustard mixture on the other slice. Repeat for the second sandwich.
  3. Layer the mayo side with cheese, lettuce, avocado and red onion. Give the lemon a very generous squeeze: at least 1/4 of the whole lemon should be juiced onto the sandwich. (Don't skimp on the Mayo, since it balances out the tartness of the lemon.)
  4. Grate salt and pepper on top. Drizzle with olive oil. Add another leaf of lettuce
  5. Assemble the sandwich and enjoy.

*This recipe is the simple version. I like spice, so usually I drizzle on some hot sauce and/or a spicy chipotle sauce - now that I am starting to warm up to the flavor. There are, of course, many delicious add-ons. For example: sliced tomatoes, cucumber, sunflower seeds, sliced red peppers, Cayenne pepper (mmmmm), sundried tomatoes, fresh garlic, beans, etc. Use your imagination!

Thursday, February 01, 2007

Feeling a little nutty


I must confess to feeling a little intimidated today. I just read a truly fabulous article by one of my favorite authors: Michael Pollan, the author of "The botany of Desire", and, more recently, "The Omnivore's Dilemma". He's a brilliant writer and scholar, and although I won't spend the entire blogspot singing his praises, I will strongly encourage you to read this superb essay, titled "Unhappy Meals". It is quite possibly the best piece of nonfiction I have read recently: the writing is clear and the logic behind his argument is powerful. If there ever was an author who summed up my beliefs as an environmentalist and foodie together, as well as what I think a perfect writing voice consists of, it would be Michael Pollan.


The process of writing a food blog entry is somewhat more involved than one might think. I spend many hours daydreaming about what I'd like to make for dinner. The initial idea is usually researched on the internet or in cookbooks; often, I just imagine dishes or ingredients in my head and iterate until I find something I'm excited about. I generally don't start writing until after I've already made the dish, taken photos, finished eating, cleaned up and edited the photos. This is when the pressure is on to write something coherent and interesting. I do enjoy writing, but I'm hardly consistent. Some days I'm in the mood to write. Some days I'm in the mood to eat. Some days I'm in the mood to take photos. Food blog days are the days I feel like all three, and after reading such Michael Pollan brilliance, today is not one of them. Feeling thus intimidated, I'll jump to a recipe. Forgive the boring photos.


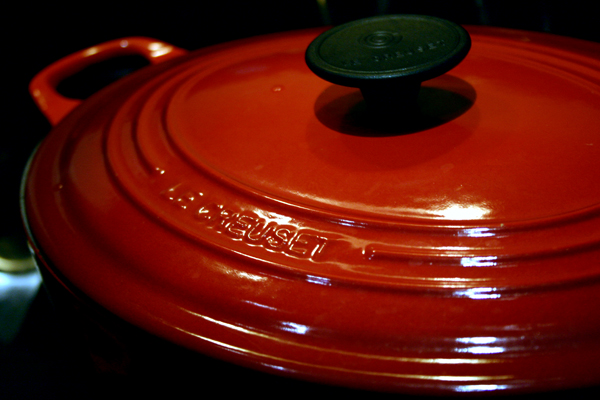
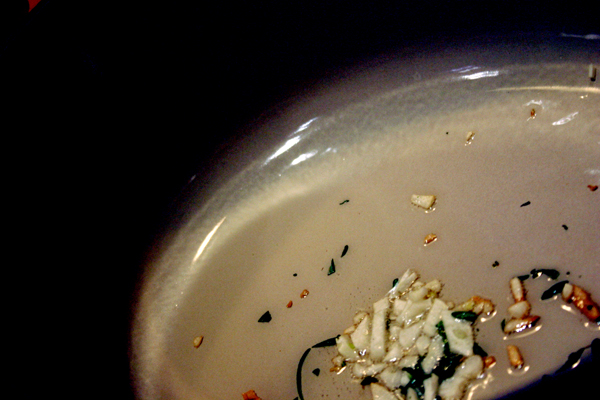
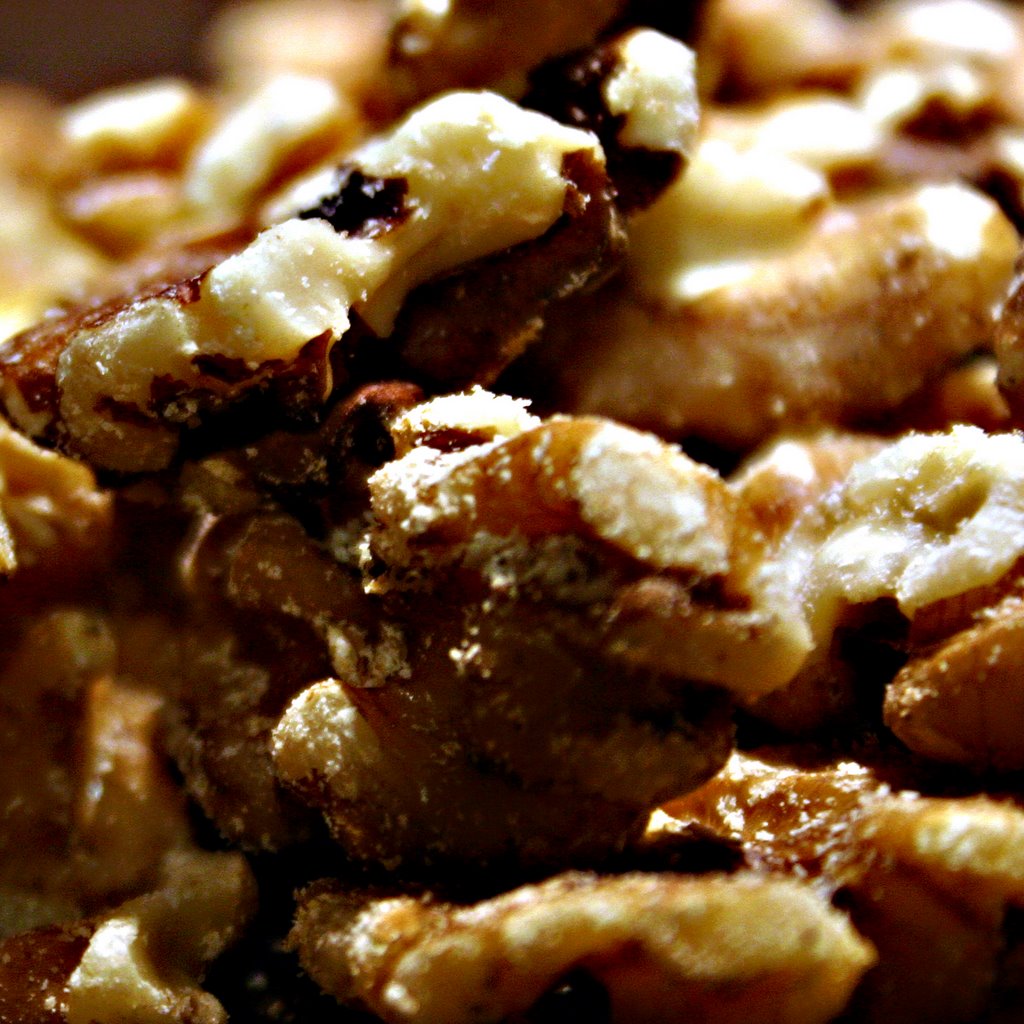
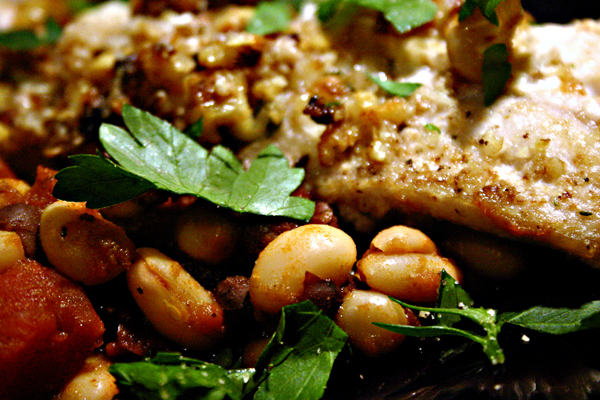
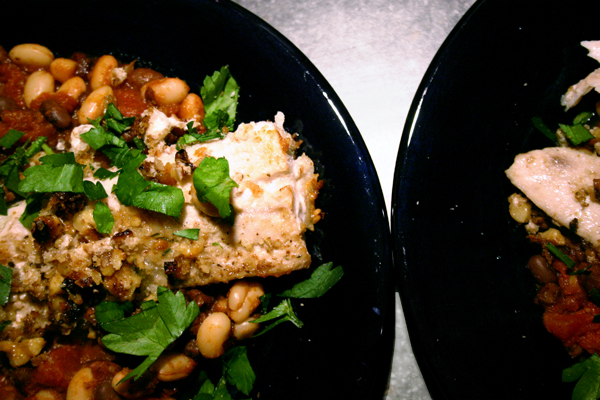
"Breading" fish in chopped nuts is an idea that I once thought was of my own invention. It turns out that other people have used the same trick (as a quick google search will confirm), but with good reason - it's delicious. The real secret to a nutty-fish success it to pick a fish that matches the nuts when they are chopped to the right texture. I have found that nuts full of oil work better when paired with a moist but firm fish - after frying the fish, they incorporate very nicely into a pan sauce. Don't expect to have crispy fish encrusted with a thin layer of nut flour: what you will get is toasted nuts in a buttery sauce with delicately flaking, moist fish to contrast. I love the texture combination.


Here, I present you with a recipe for Walnut Encrusted Mahi Mahi with Black and White Bean Base. Sounds strange? Certainly. It is unconventional. But it's also great, and like some other recently odd creations, you're simply not allowed to tease until you try it yourself. It's a nice change from oh so traditional flour-egg-breadcrumb scheme. Sometimes I do nutty-fish with lots of spice and a simple butter sauce; today, I wanted a hearty and filling accompaniment to a white bean stew. It was very filling without being heavy. As Greg put it, this is a dish that satisfies you in all ways.


Walnut Encrusted Mahi Mahi with White and Black Bean Base
Serves 2*

2 tbsp olive oil
2 cloves garlic, chopped
1 sprig fresh rosemary, roughly chopped
12 oz Mahi Mahi
1/4 cup panko breadcrumbs
3/4 cup walnuts, finely chopped
1 tbsp ground black pepper
1 tbsp ground sea salt

1 cup white wine
1 tbsp red pepper flakes
16 oz white beans (not cannelini - look for Italian white beans), well rinsed and drained
16 oz black beans, well rinsed and drained
2 cups stewed, chopped tomatoes
Handful chopped flat leaf parsely

  1. Preheat oven to 350 degrees
  2. Start oil, garlic, and half of the rosemary heating over medium heat in a heavy cast iron pan.
  3. Mix breadcrumbs, walnuts, salt and pepper in a dish. Pat onto fish surface. Immediately fry until walnuts take on a golden brown color (approximately 1-2 minutes per side - the fish will not be cooked through)
  4. Carefully transfer fish with most of the walnuts to a foil lined pan and finish cooking in the oven (depending on the thickness of the fish, around 10 minutes. Be careful not to overcook the fish or burn the walnuts).
  5. Meanwhile, deglaze pan with wine and scrape up any crispy bits. Add tomatoes, beans, red pepper flakes and remaining rosemary. Simmer uncovered for at least 10 minutes, while the fish cooks.
  6. Serve fish on top of black and white bean base, with chopped parsley to garnish
*This recipe will make extra bean stew, but I'd rather have extra bean stew than extra (somewhat random) amounts of white and black beans. You could also double the fish amount and stretch the stew with some extra tomatoes or stock. I think I'll have the stew on its own for lunch tomorrow : )