William-Sonoma, you tricked me. You, master of cookie cookbooks, king of classic cookie recipes... you, you failed me.
Sort of.
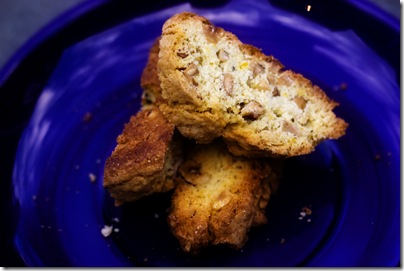
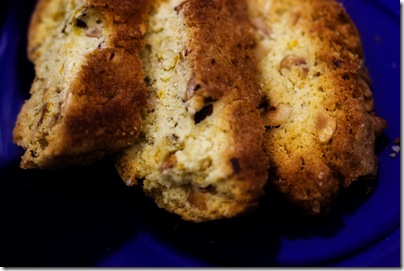
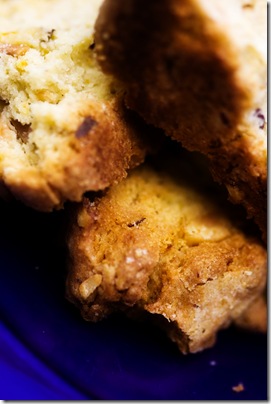
Actually, these biscotti are amazing and I think you should make them first thing tonight before you go to bed. I can't stop eating them. What I take issue with is that William Sonoma makes a whole big pointed fussy scene about how you should cream the butter and sugar until no grit can be felt between your fingers. Now, I've used this advice in other recipes and been very happy with it - properly creamed butter and sugar provide for moist, substantial cookie crumb. Whenever you've tasted homemade cookies with perfectly moist, even texture, they probably creamed the butter and sugar really, really well.
But I made these biscotti twice - once, in a rush, with fridge cold butter and just incorporated sugar, and a second time, with fridge cold butter that I creamed with the sugar for almost 15 minutes over a bowl of steaming water to help the butter along - and the verdict's in: biscotti do not benefit from properly creamed, room temperature butter, at least in this recipe. In fact, they're better off with gritty bits of butter and sugar that cut into the flour. The first batch came out crumbly and dry but not hard. They melted in my mouth. The second batch was more cake-like or cookie-like than biscotti-like. I didn't want cake-like or cookie-like, I wanted biscotti-like: crumbly, dry, melt in your mouth biscotti. Then I sent samples of both batches to my grandmother - queen of all things biscotti - and she declared her preference for the well-creamed-butter batch. So, take your pick.
My advice would be to cream your butter and sugar for about four to five minutes in a stand mixer. Oh, and make these: they're nutty, crumbly, buttery, not too hard, not too sweet, perfectly crisp, flecks of orange zest balanced by loads of cinnamon and toasted, fragrant hazelnuts...last for at least a week...so simple and delectable.
By the way, last Saturday morning, our alarm clock self-adjusted for daylight savings time one day too early. We scrambled out of bed because I was frantic to get to lab on time, and then I found myself with one extra hour before needing to go take care of my experiment. So I made biscotti. In scrolling down the past few entries of this cooking blog, I just realized that it is has been fairly heavy on the sweets and low on the savory. I figure I owe y'all an explanation. See, I've been working crazy hours for the past two weeks and we've been, <gasp>, surviving entirely on take-out. This schedule was all supposed to last for the entire month of April, until a fellow lab member kind of screwed me over in an aggressive battle for the surgical space that I needed and the remaining half of my experiment has pushed until the end of April. </rant>. Her rudeness = my inconvenience = better for our sustenance!
Hazlenut and Dried Cherry Biscotti
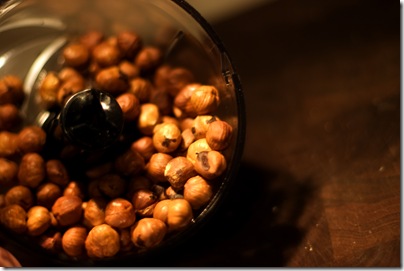
Recipe reworded from William-Sonoma Cookies. Note that you could substitute any toasted nut or dried fruit that you wish - I tried macadamia nuts too, but I prefer the hazlenuts by far.
Makes ~24 biscotti
1/2 cup unsalted butter
3/4 cup granulated sugar
1 tbsp grated orange zest
2 large eggs
2 tsp vanilla extract
1 3/4 (280g) unbleached all-purpose flour
1/2 tsp baking powder
1/2 tsp ground cinnamon
1/4 tsp salt
1 cup hazlenuts, toasted and skinned, coarsely chopped
1/2 cup dry cherries, coarsely chopped, optional
Preheat the oven to 350. Line a baking sheet with parchment*.
Cream the butter and sugar with the zest. Add the eggs one at a time, beating well on low speed after each addition. Beat in the vanilla on low speed until blended.
Sift the flour, baking powder, cinnamon and salt together onto a sheet of parchment paper. Add the flour mixture in two or three additions to the egg mixture, stirring just until incorporated. Stir in the hazlenuts and cherries until evenly distributed. The batter should be very soft.
Turn the batter out onto a floured surface and divide in half. Shape into a log about 12" long and 1.5" in diameter. Press lightly on the top to flatten the log into a biscotti shape. Shape the second log, leaving at least 4" between the two (they will spread as they bake).
Bake the logs until the edges are golden, 25-30 minutes. Let the logs cool for 10 minutes. Using a serrated knife, cut the logs on the diagonal to 1/2" slices. Turn the slice on their sides and return them to the oven. Bake them until the edges are golden, about 10 minutes longer. Cool completely and store in an airtight container.
*You can toast the hazlenuts at this point if needed. Just put them in the oven for ~10 minutes, then skin them between hands or a towel - don't let them burn.